Official blog of www.NeedlePaint.com
where you can design your own Needlepoint!

NeedlePoint Kits and Canvas Designs | Design your own Needlepoint Kit!

Archive for the ‘How to NeedlePoint’ Category

Easy Sew Christmas Stocking with Cuff

Written by Peggy Bond

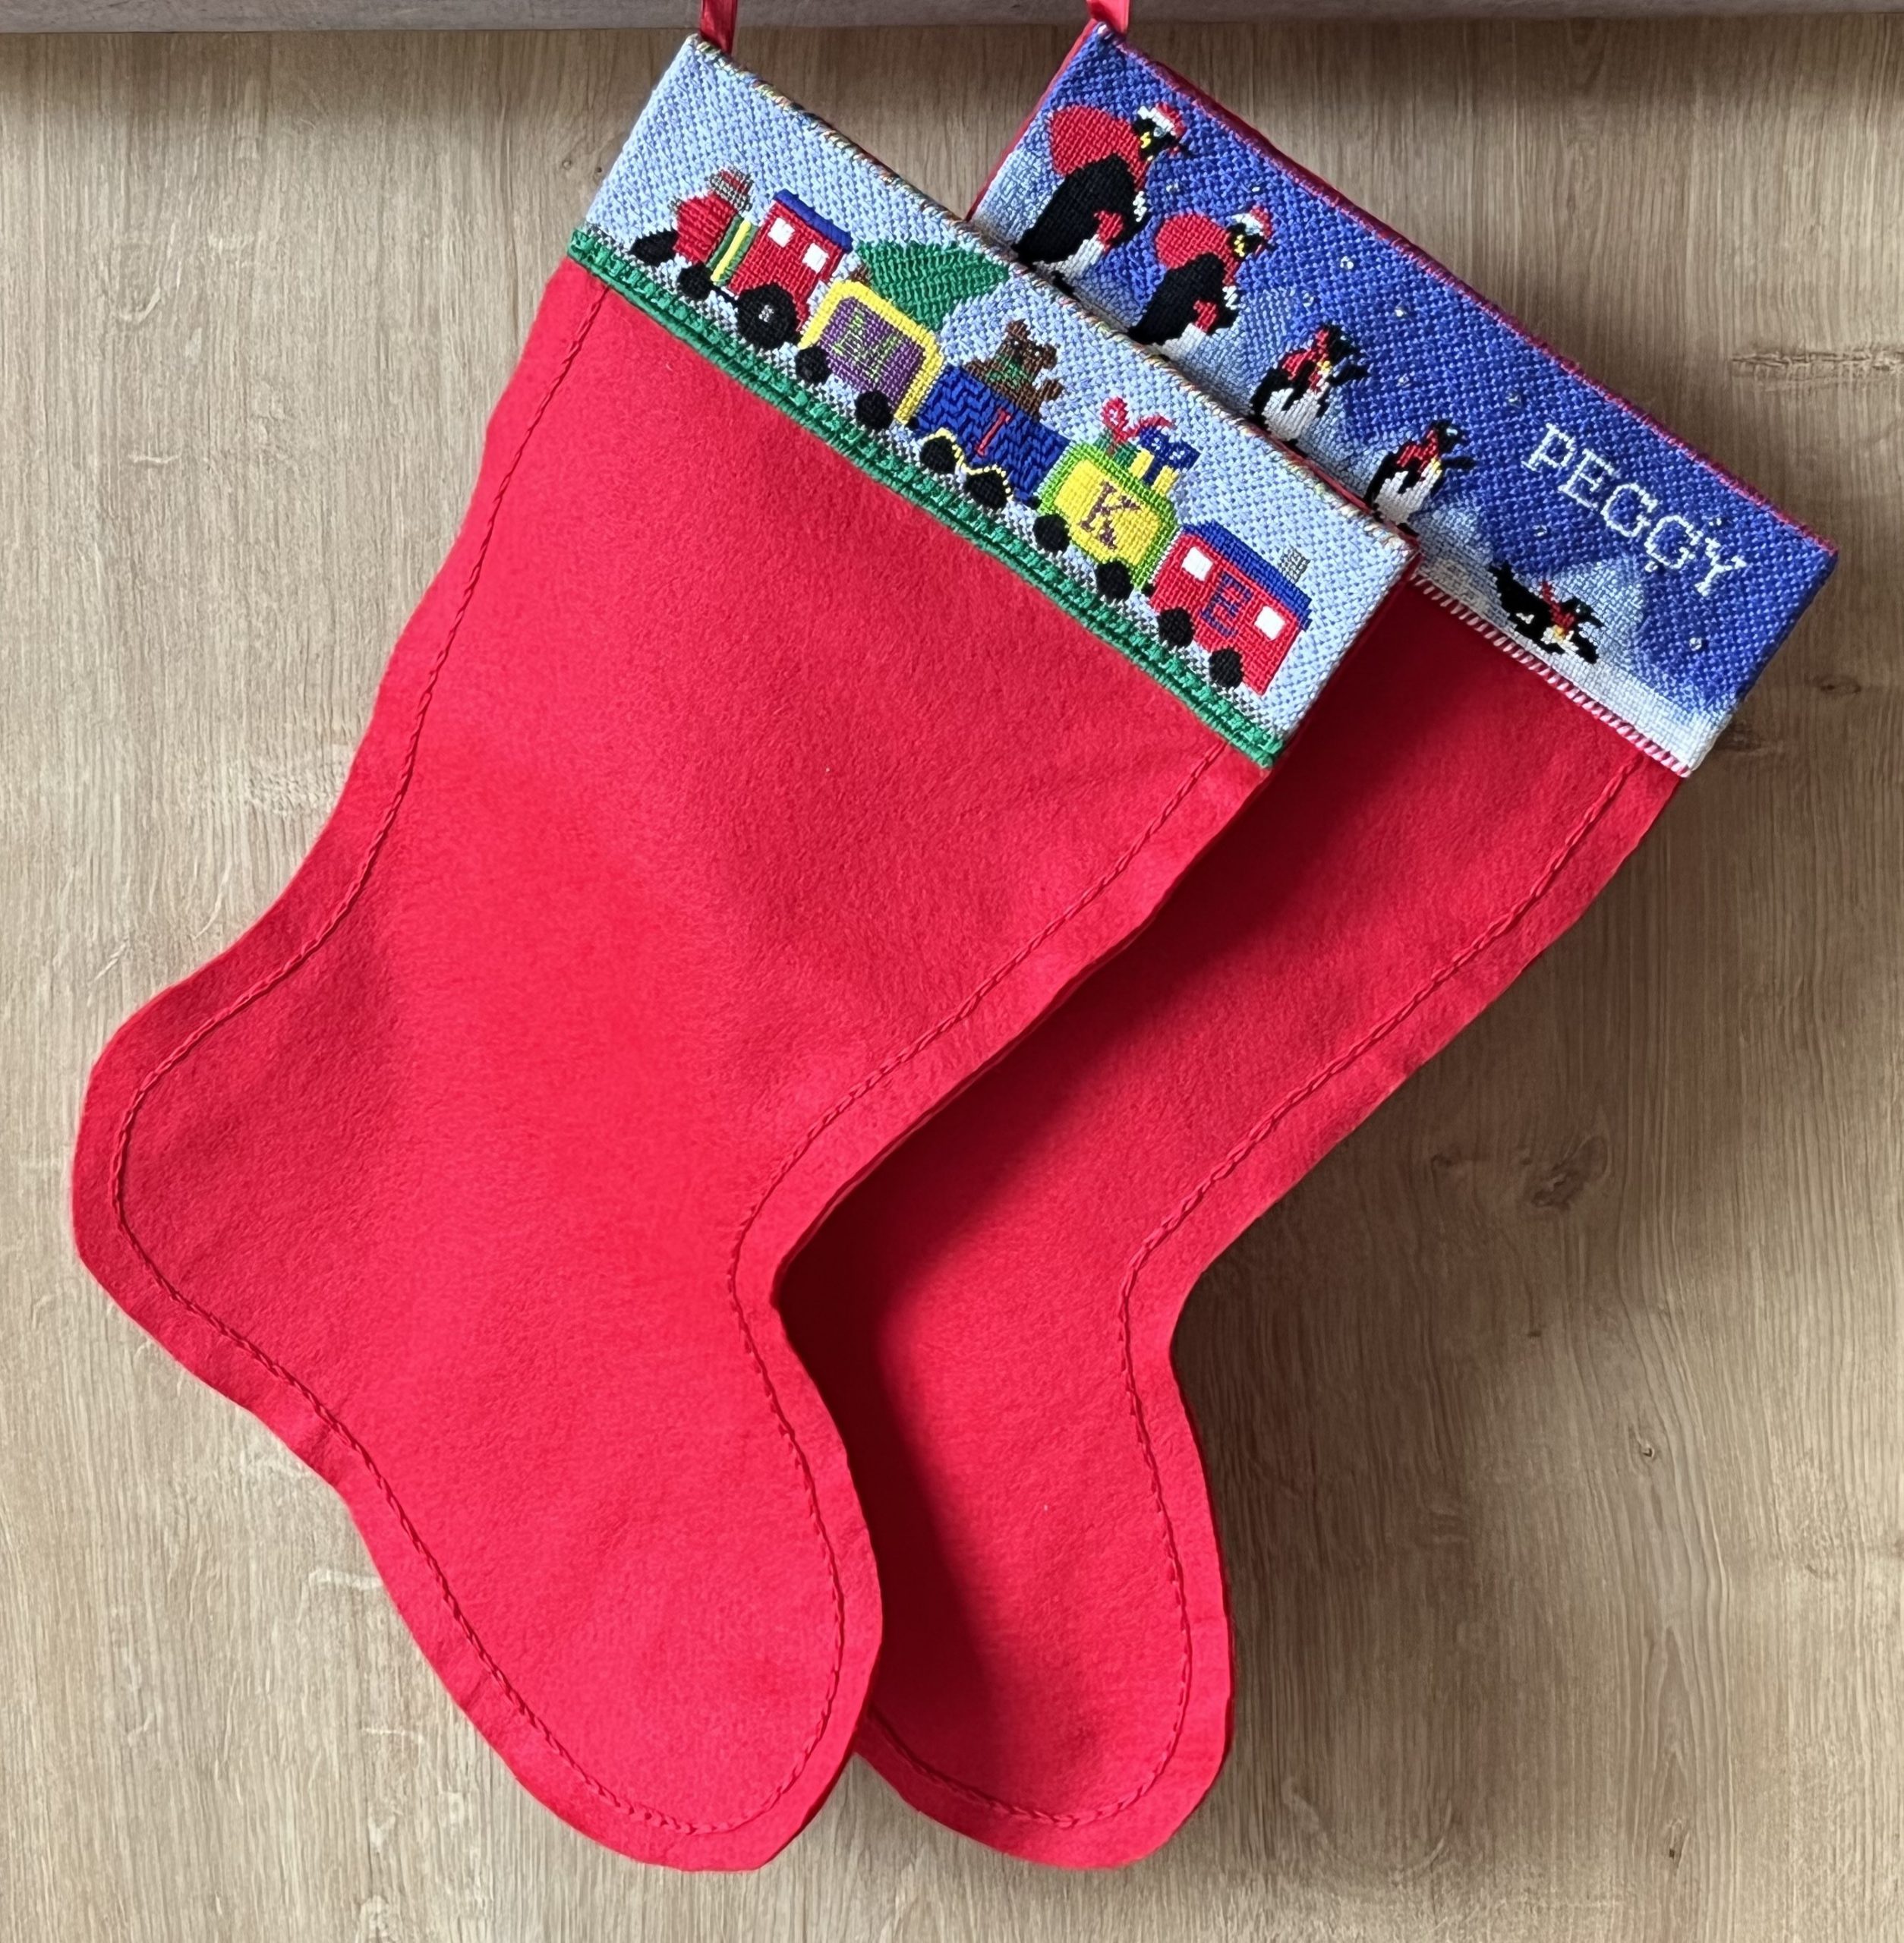
The Christmas season for me always brings back family memories – baking fruit cakes, decorating cookies, making gifts, shopping for a special gift, decorating the tree, and hanging Christmas stockings. While thinking about this coming Christmas, I remembered the long ago year when my older sister and I were 12 and 9 years old, and made felt Christmas stockings. We spelled our names out with sequins and stitched them together with yarn. It made me nostalgic and reminded me that my husband and I did not have stockings.  

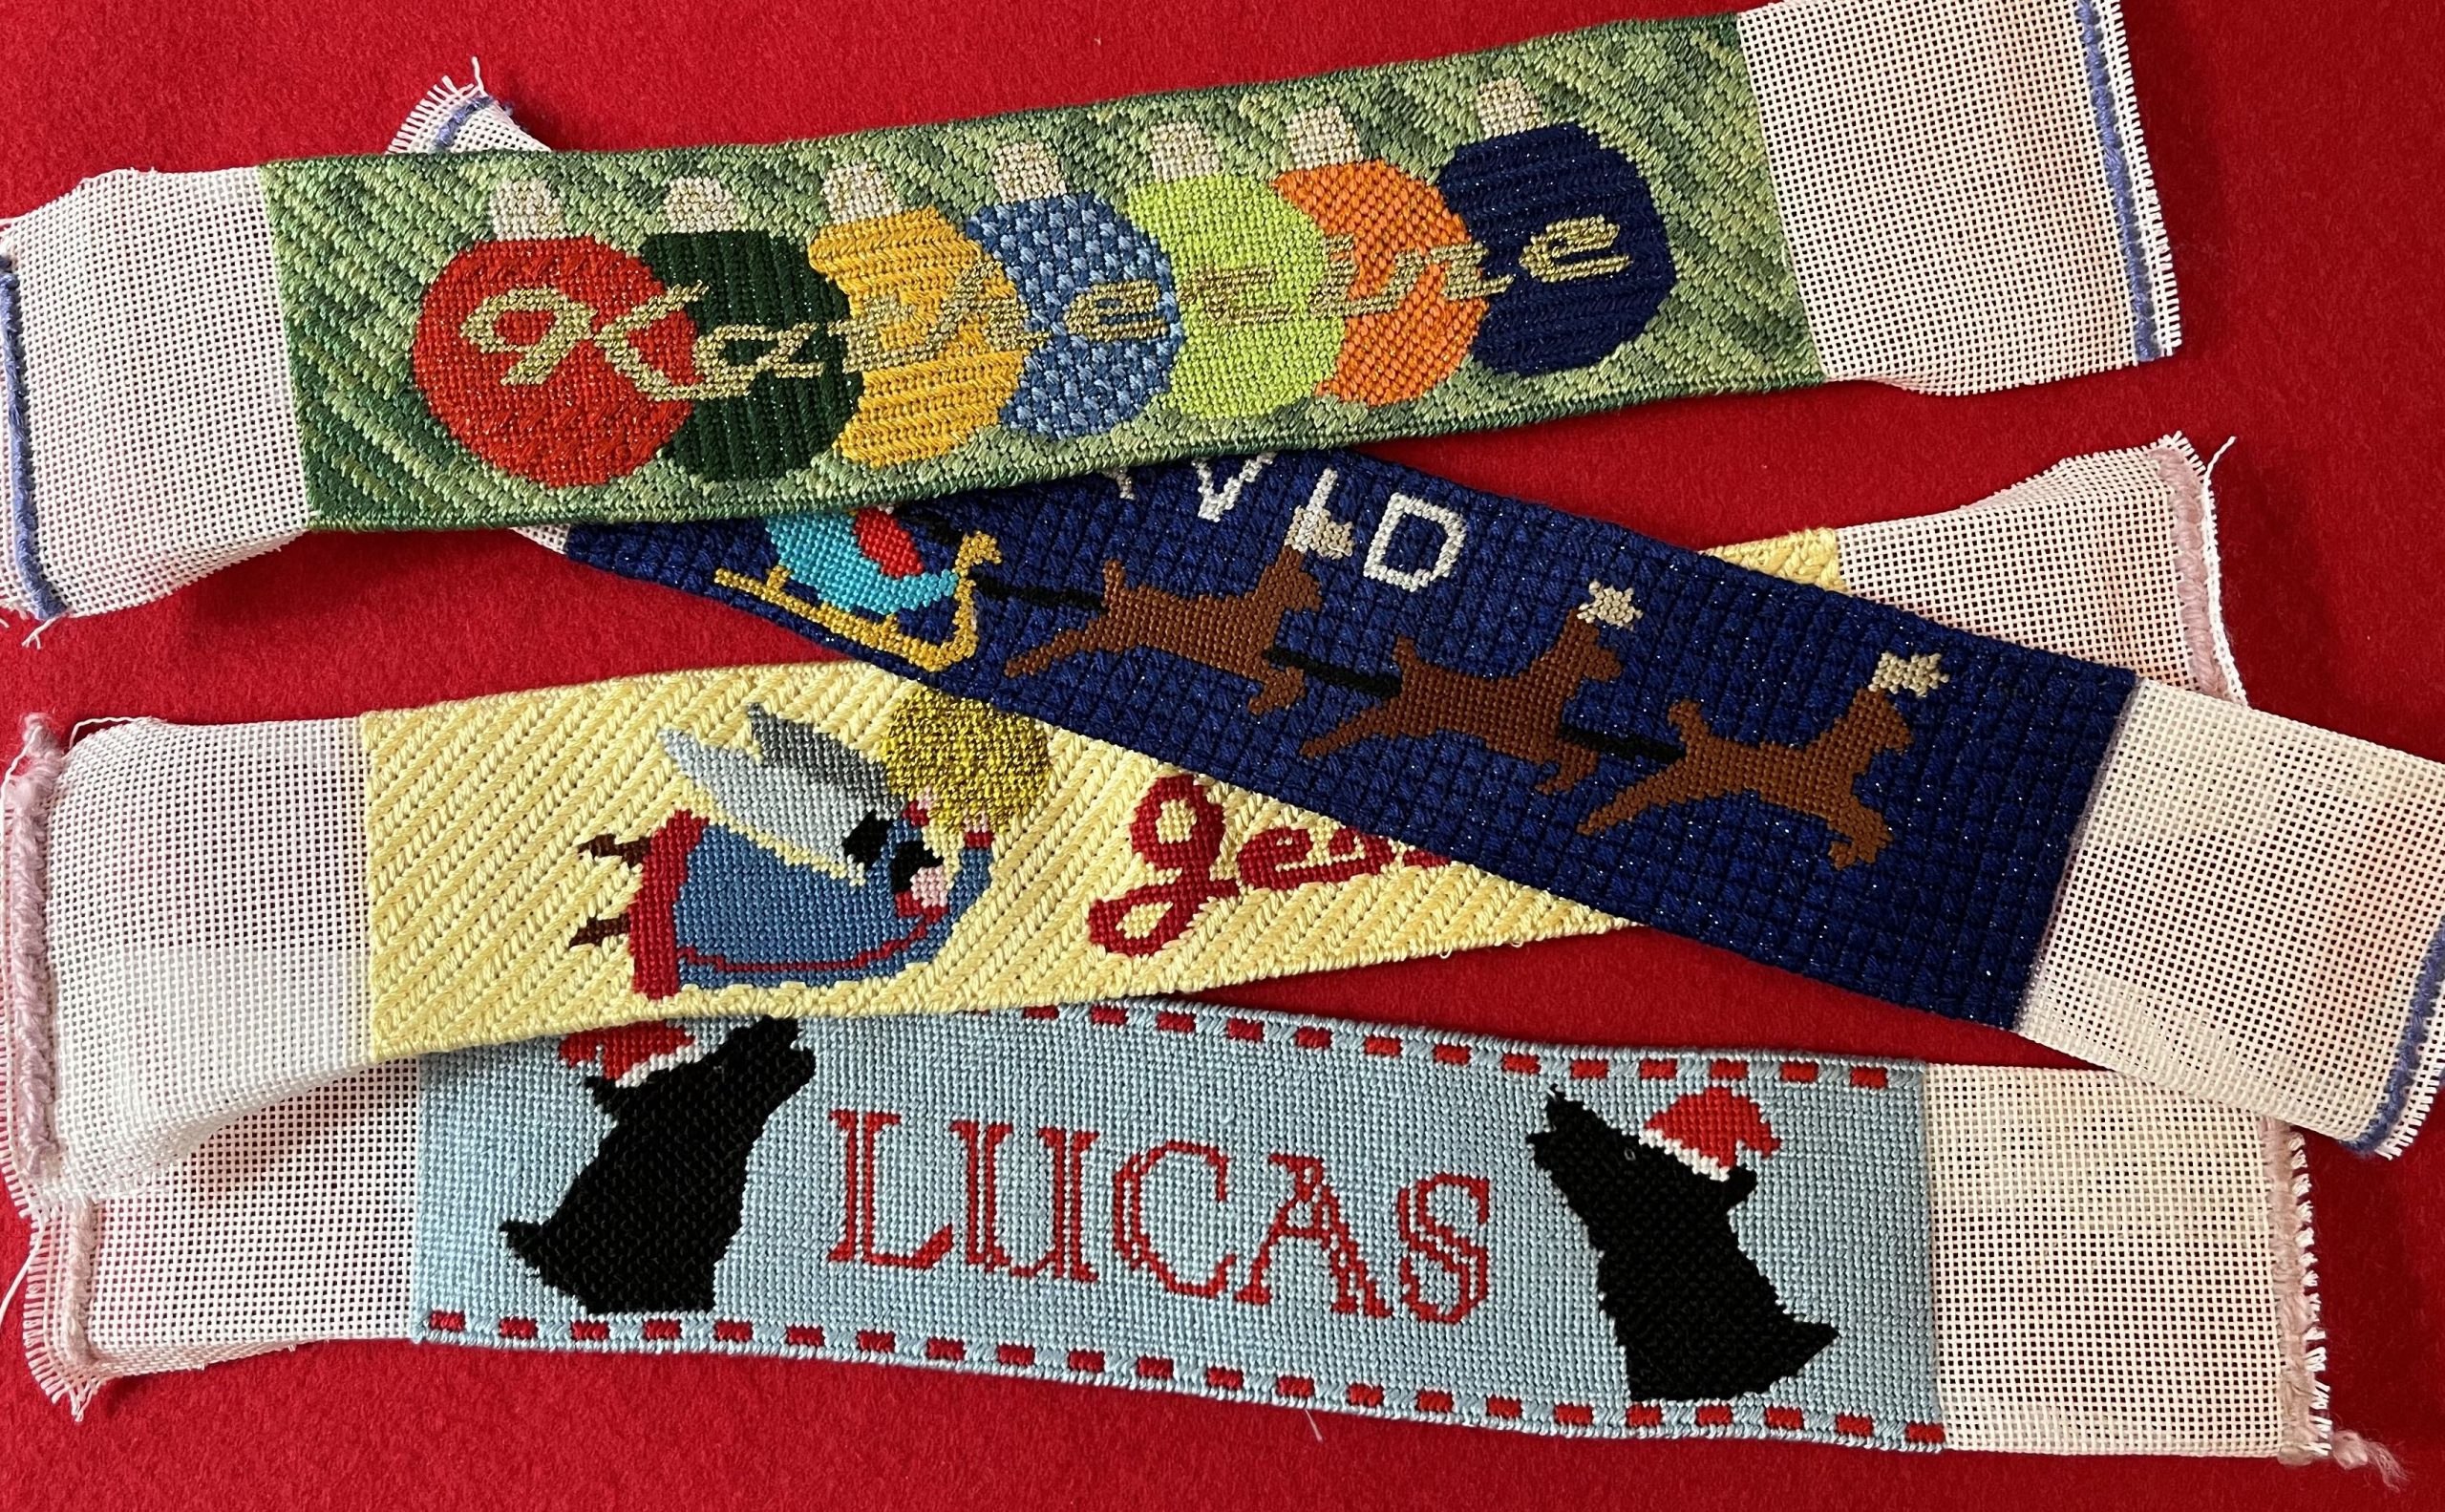
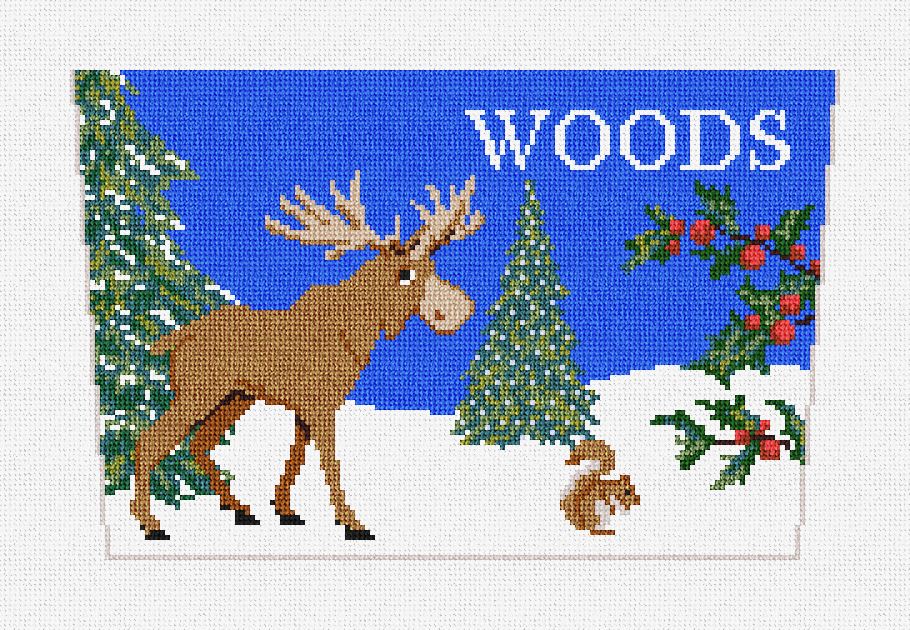
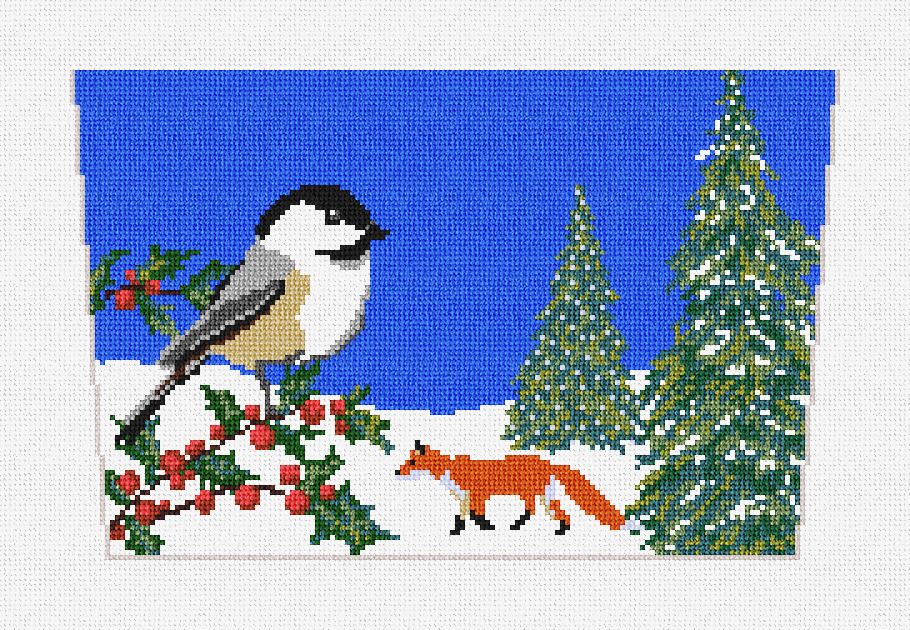
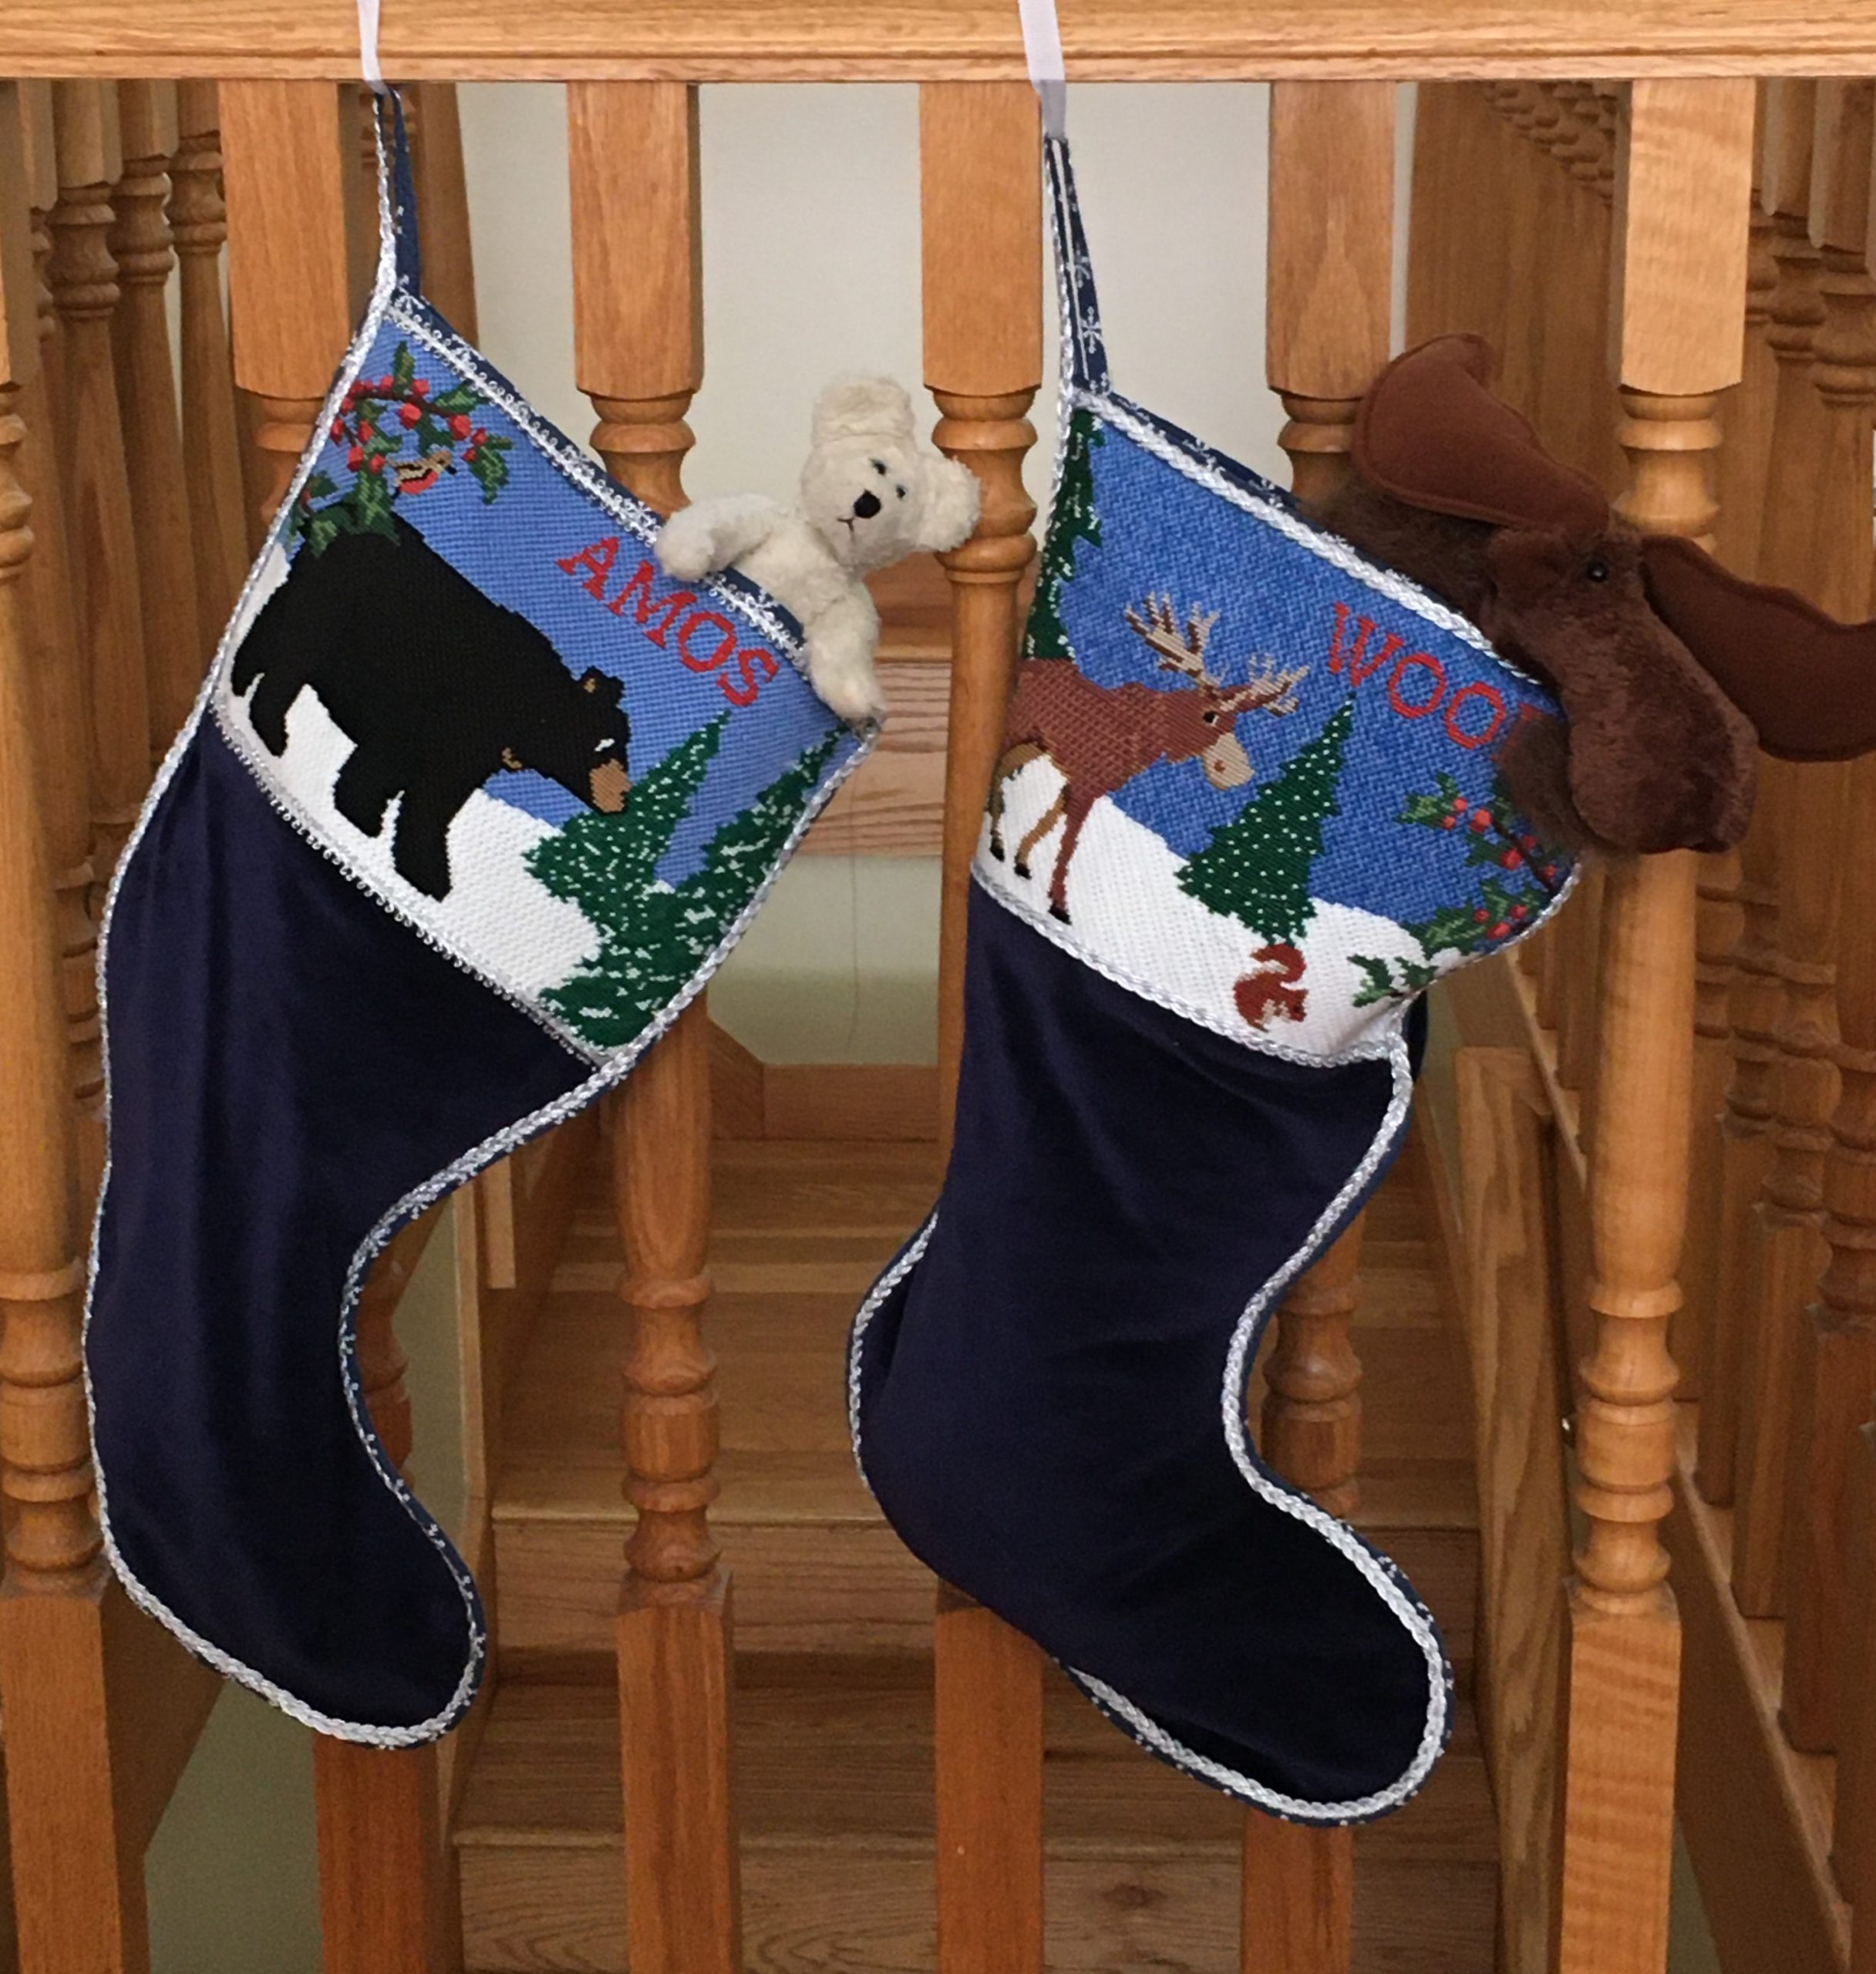
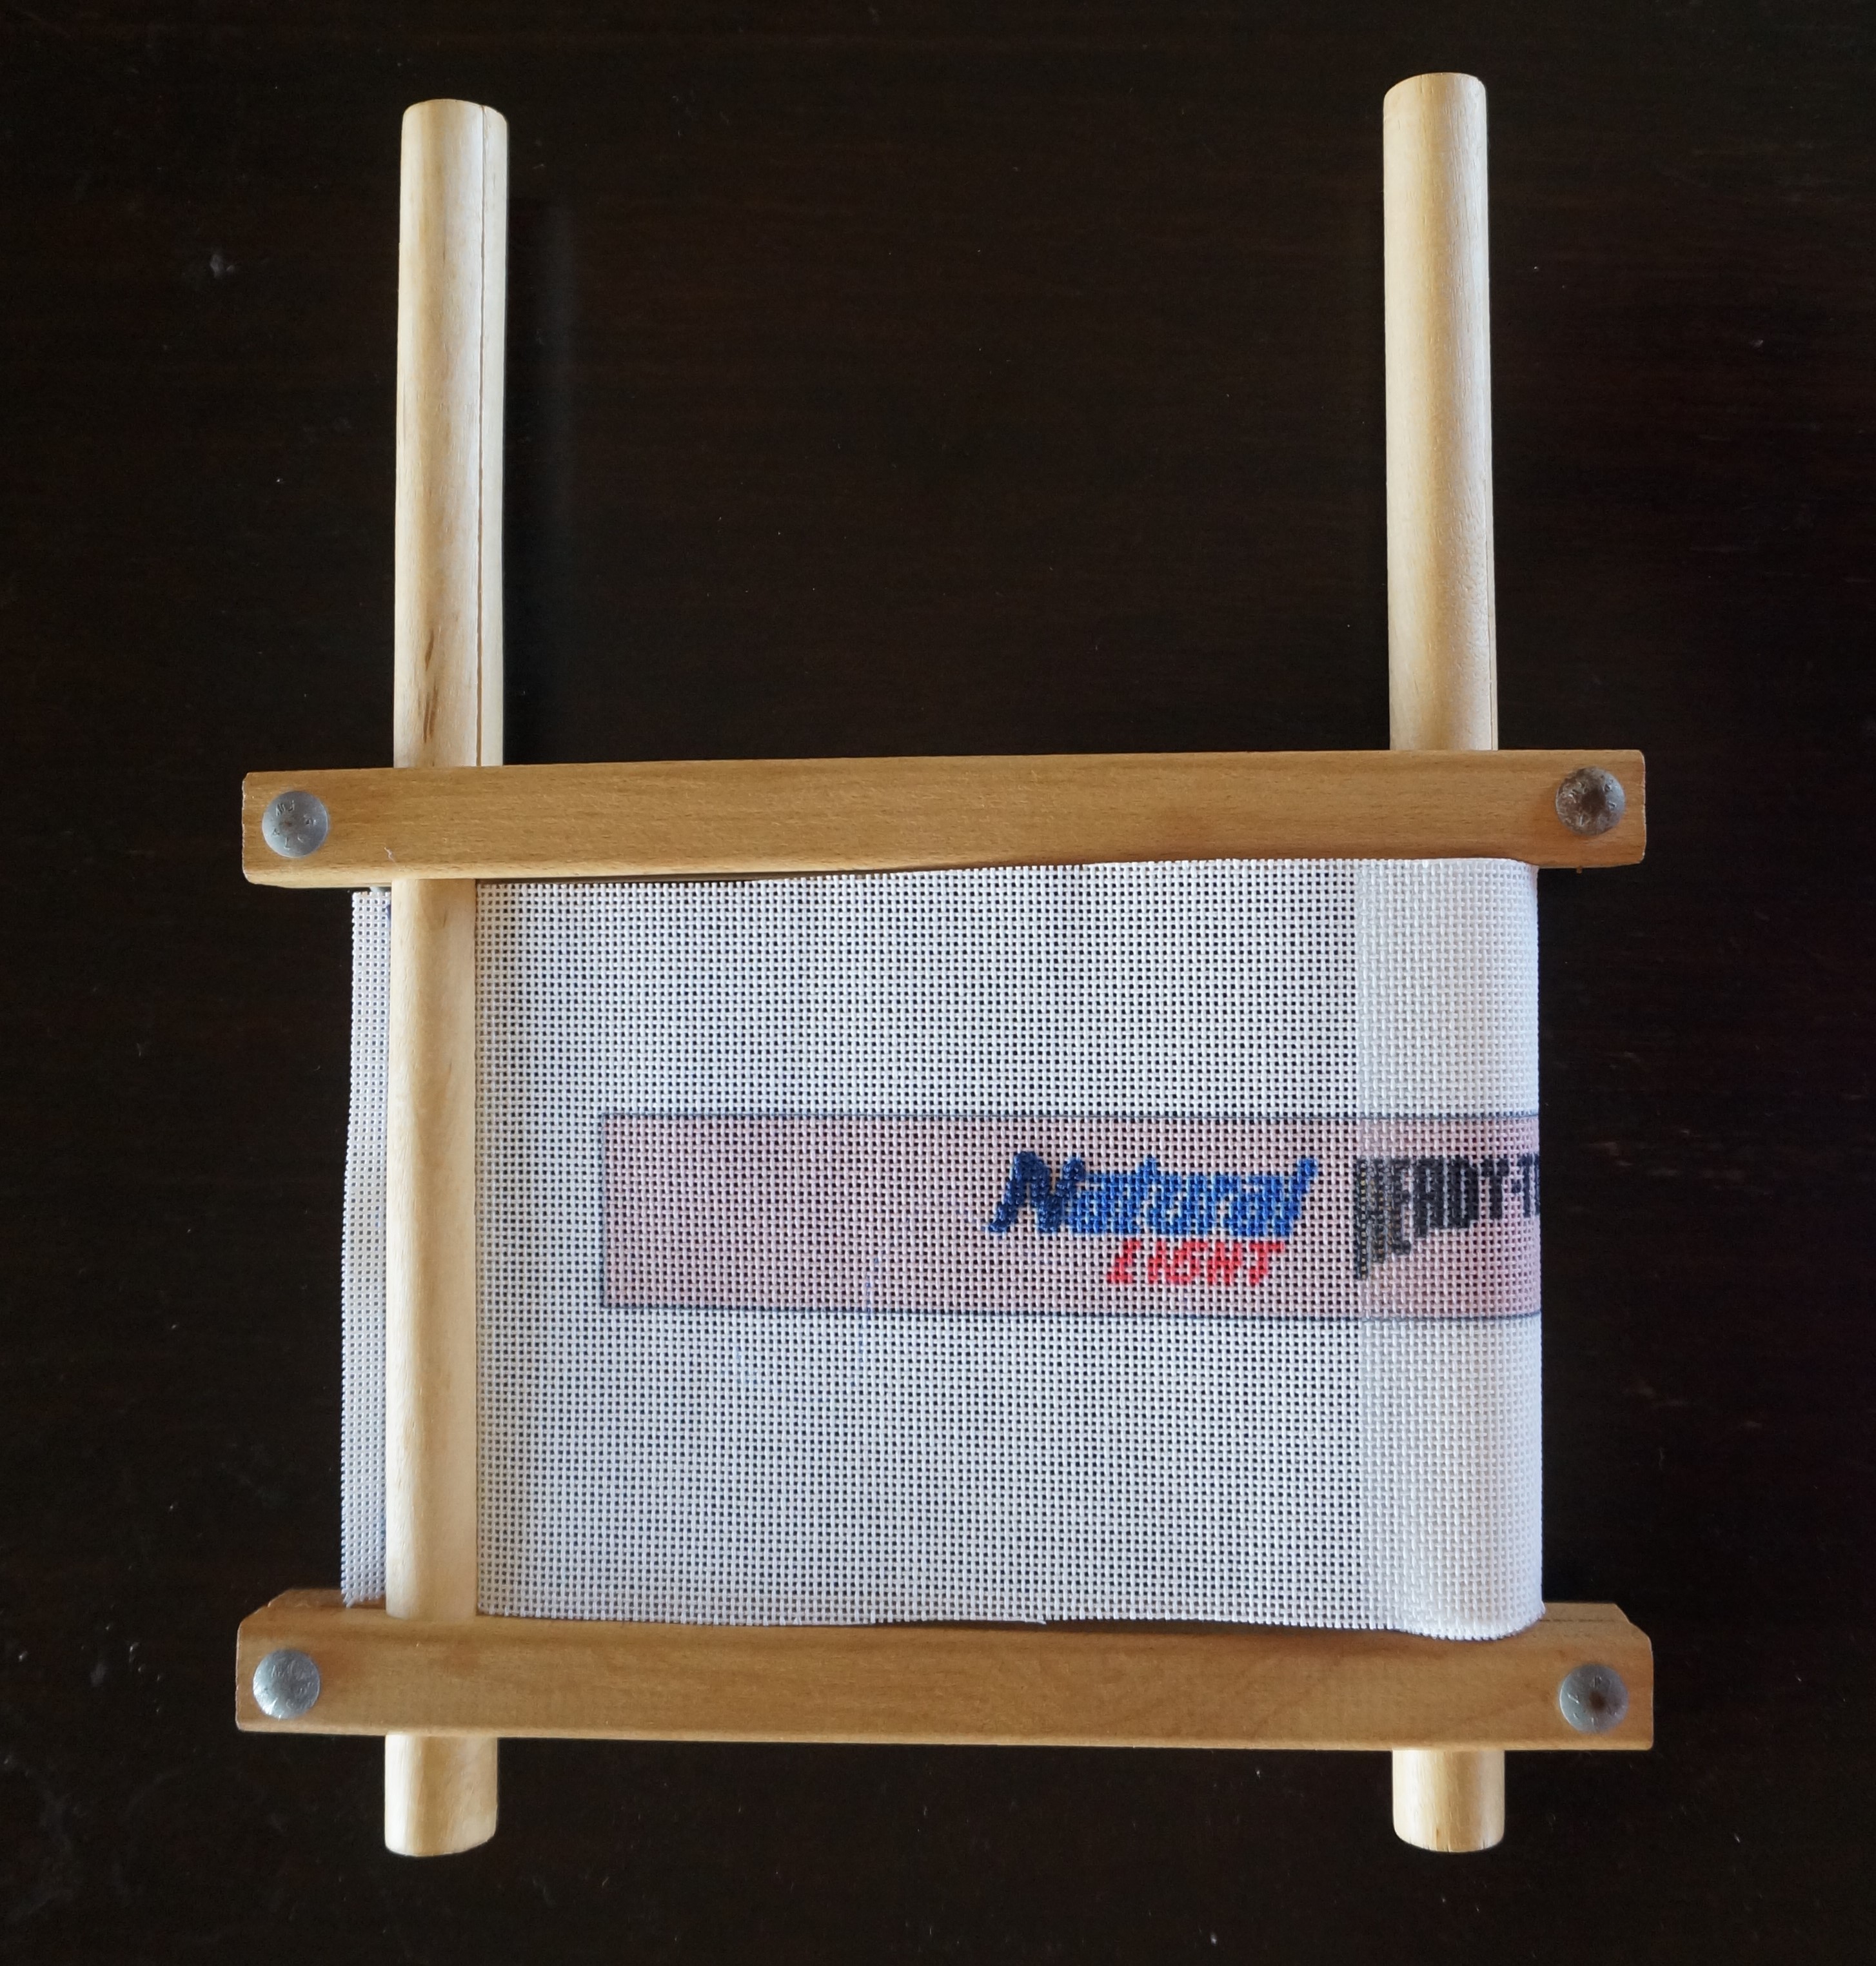
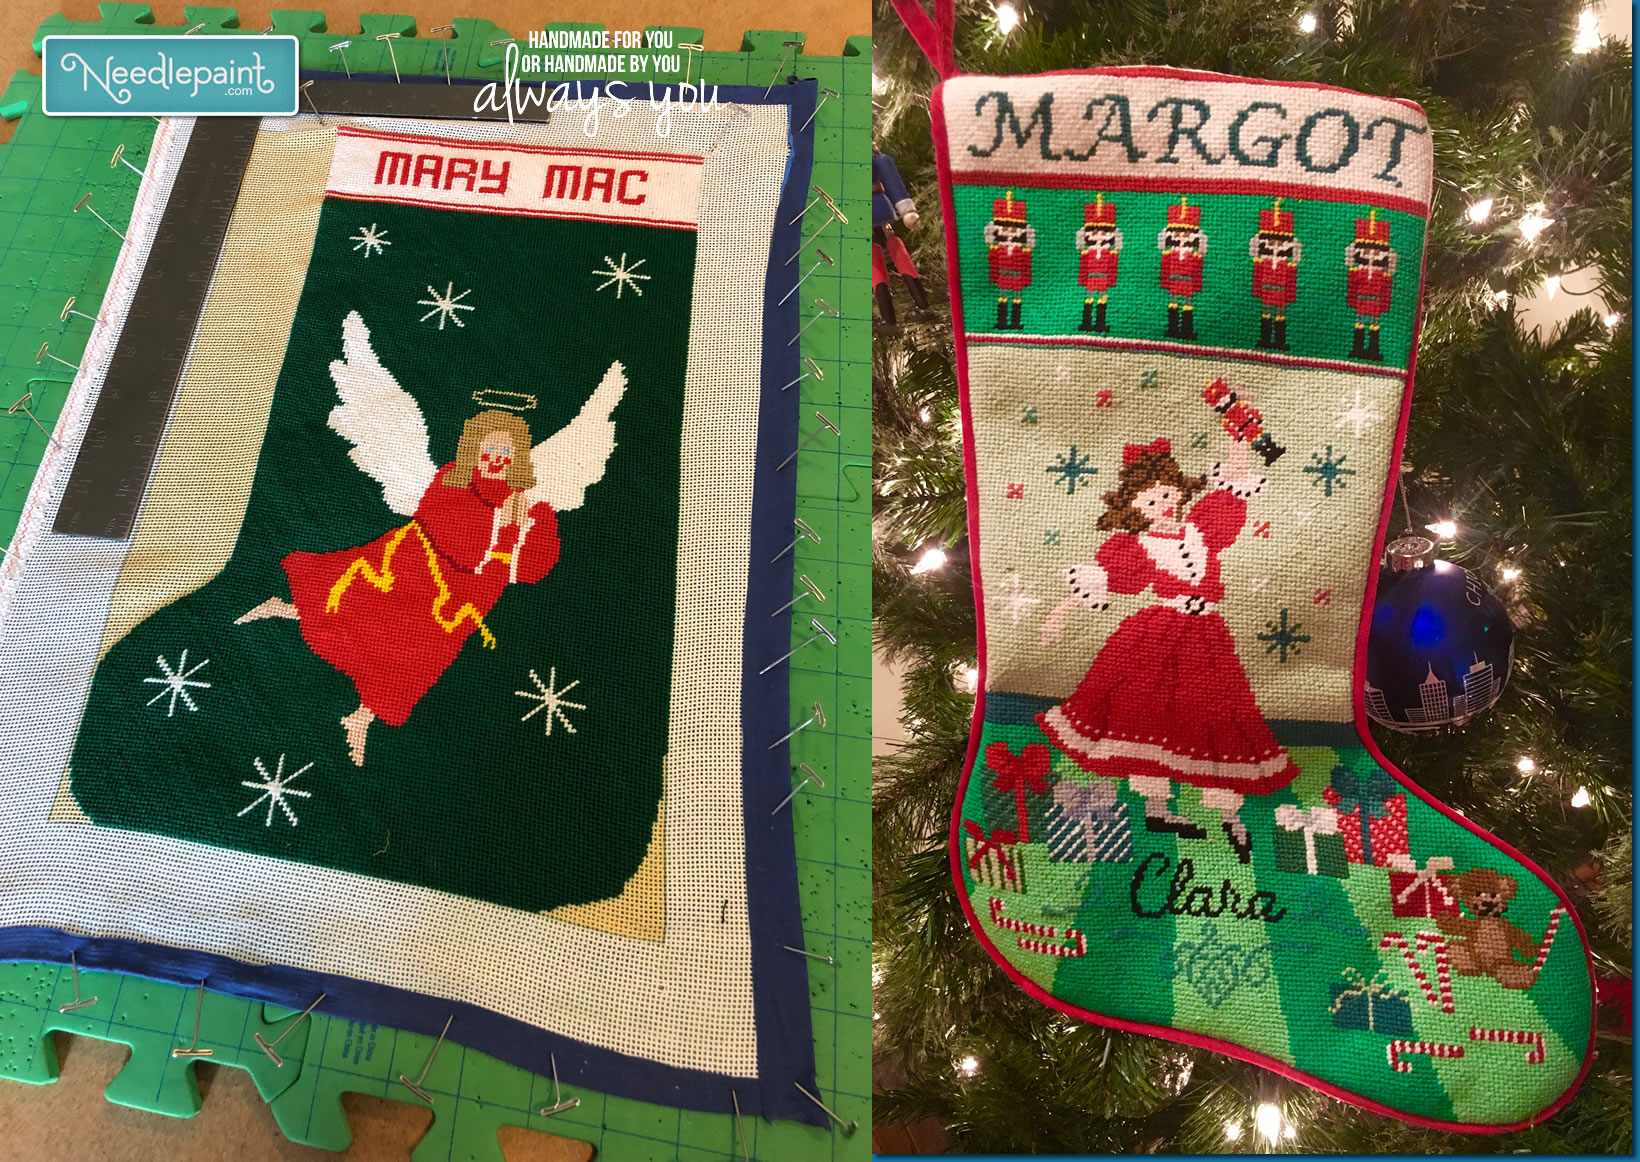
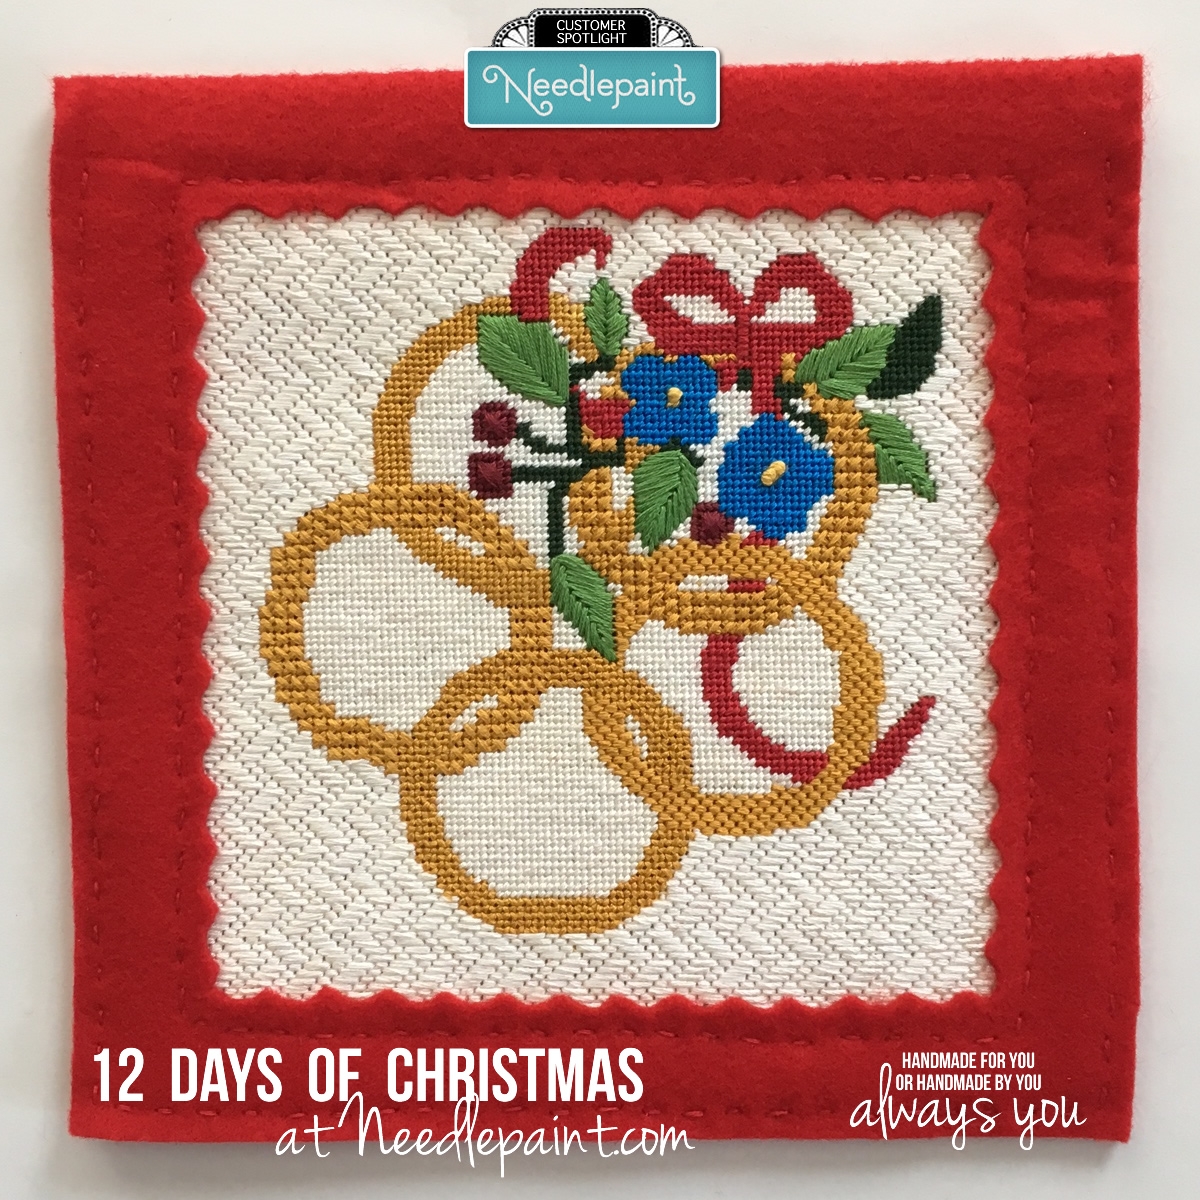
Inspired by the Needlepaint stocking cuffs, I adapted my old Needlepaint Christmas ornament designs for use as cuffs on stockings. These small 10” x 2.5” canvases were quick to stitch. The top and bottom edges of the cuff were finished with an overcast stitch as described below, and the sides folded under. It was easily sewn onto the front piece of the felt stocking. Front and back of the stockings were stitched together with embroidery thread using a chain stitch. I was traveling when I made these and didn’t have my sewing machine, so all was done by hand.

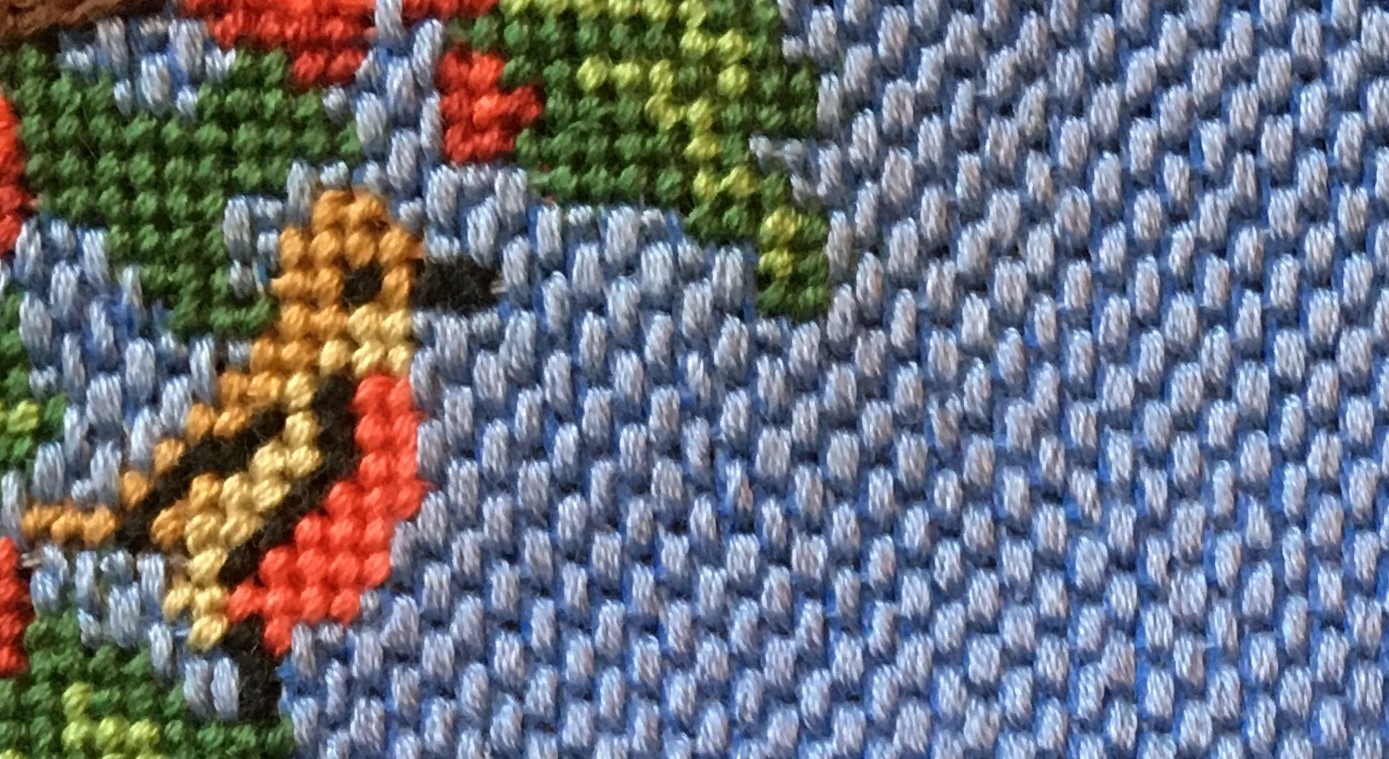
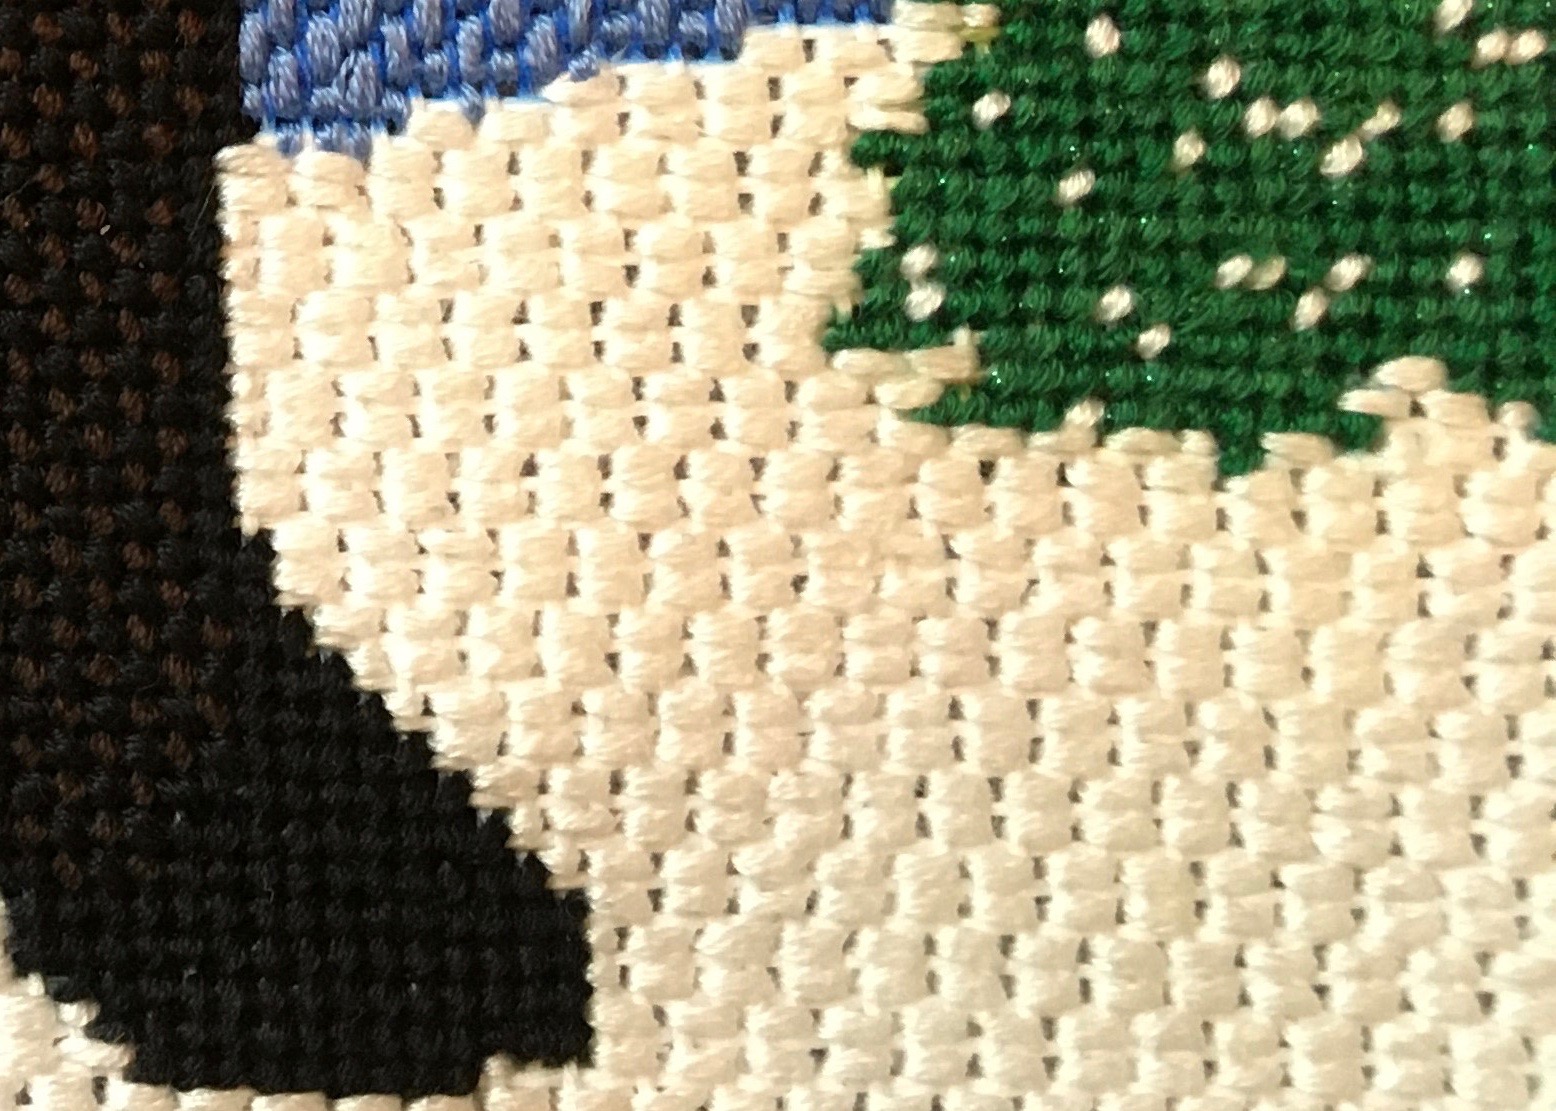
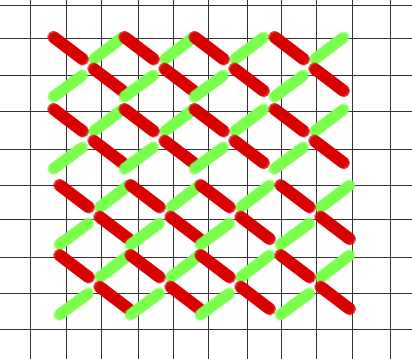
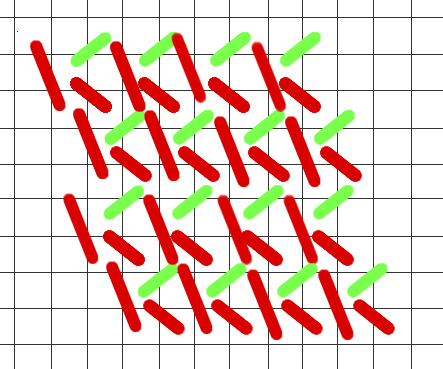
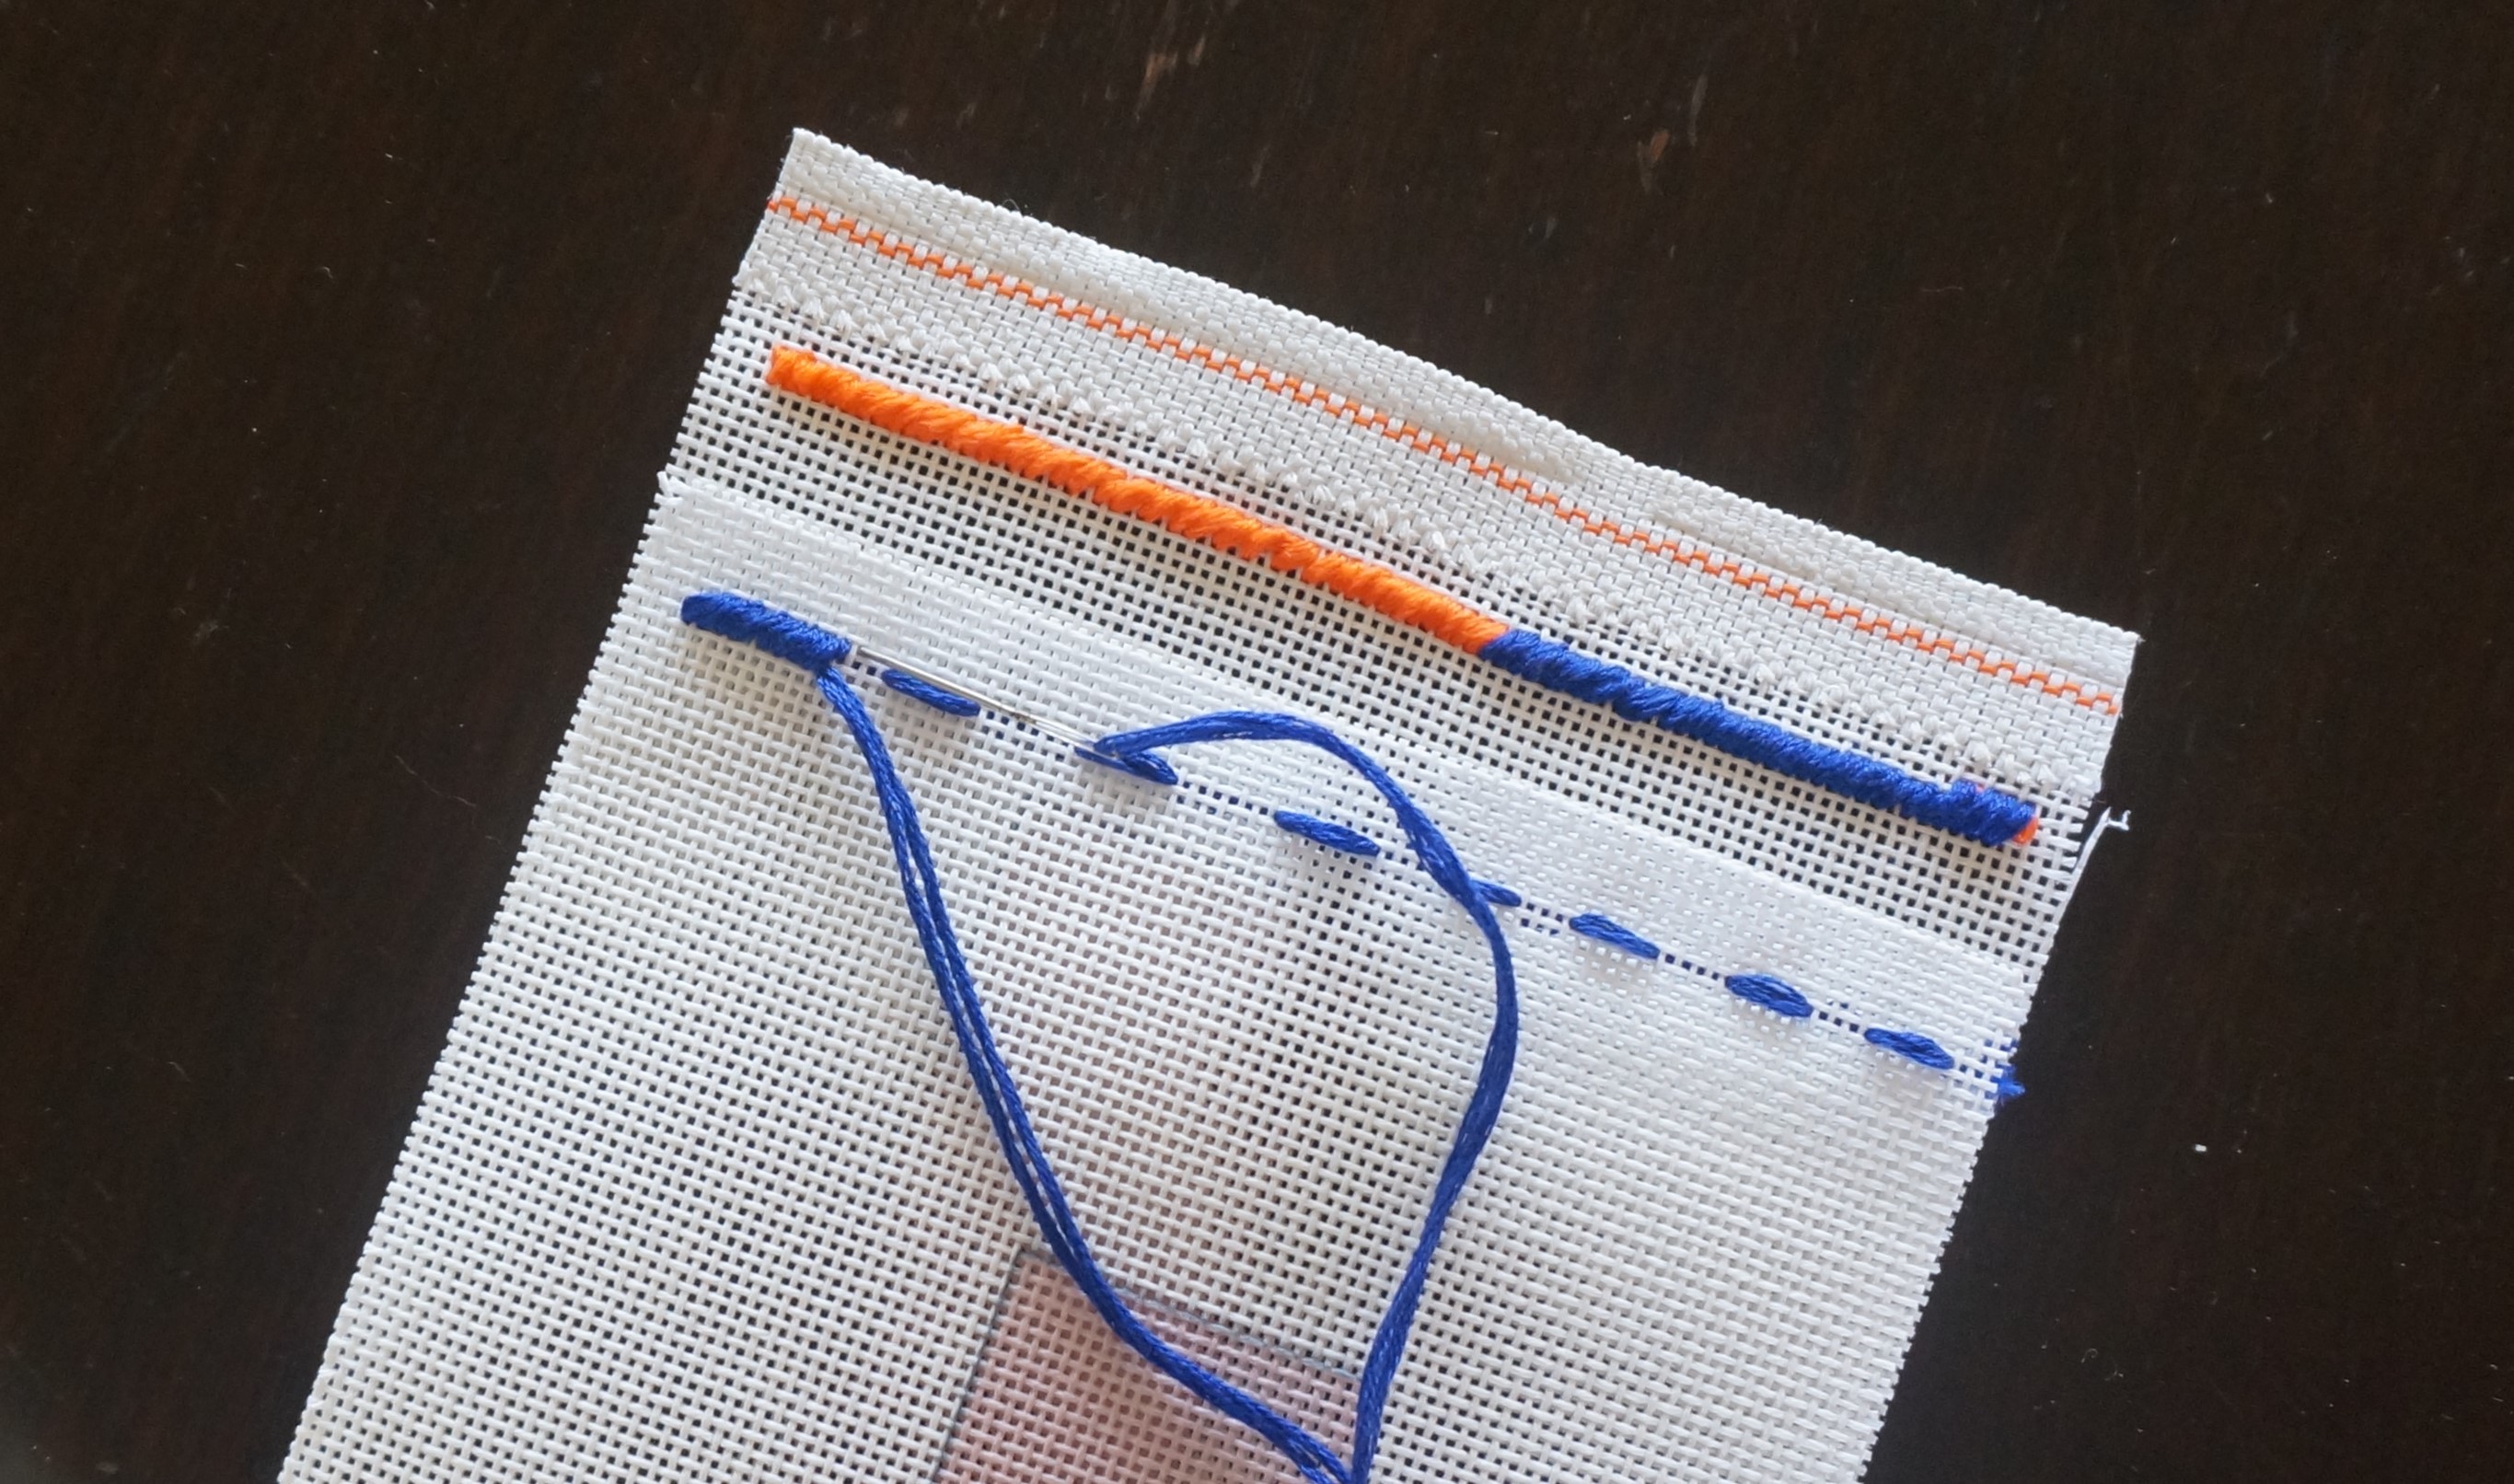
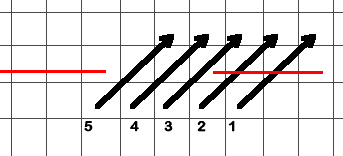
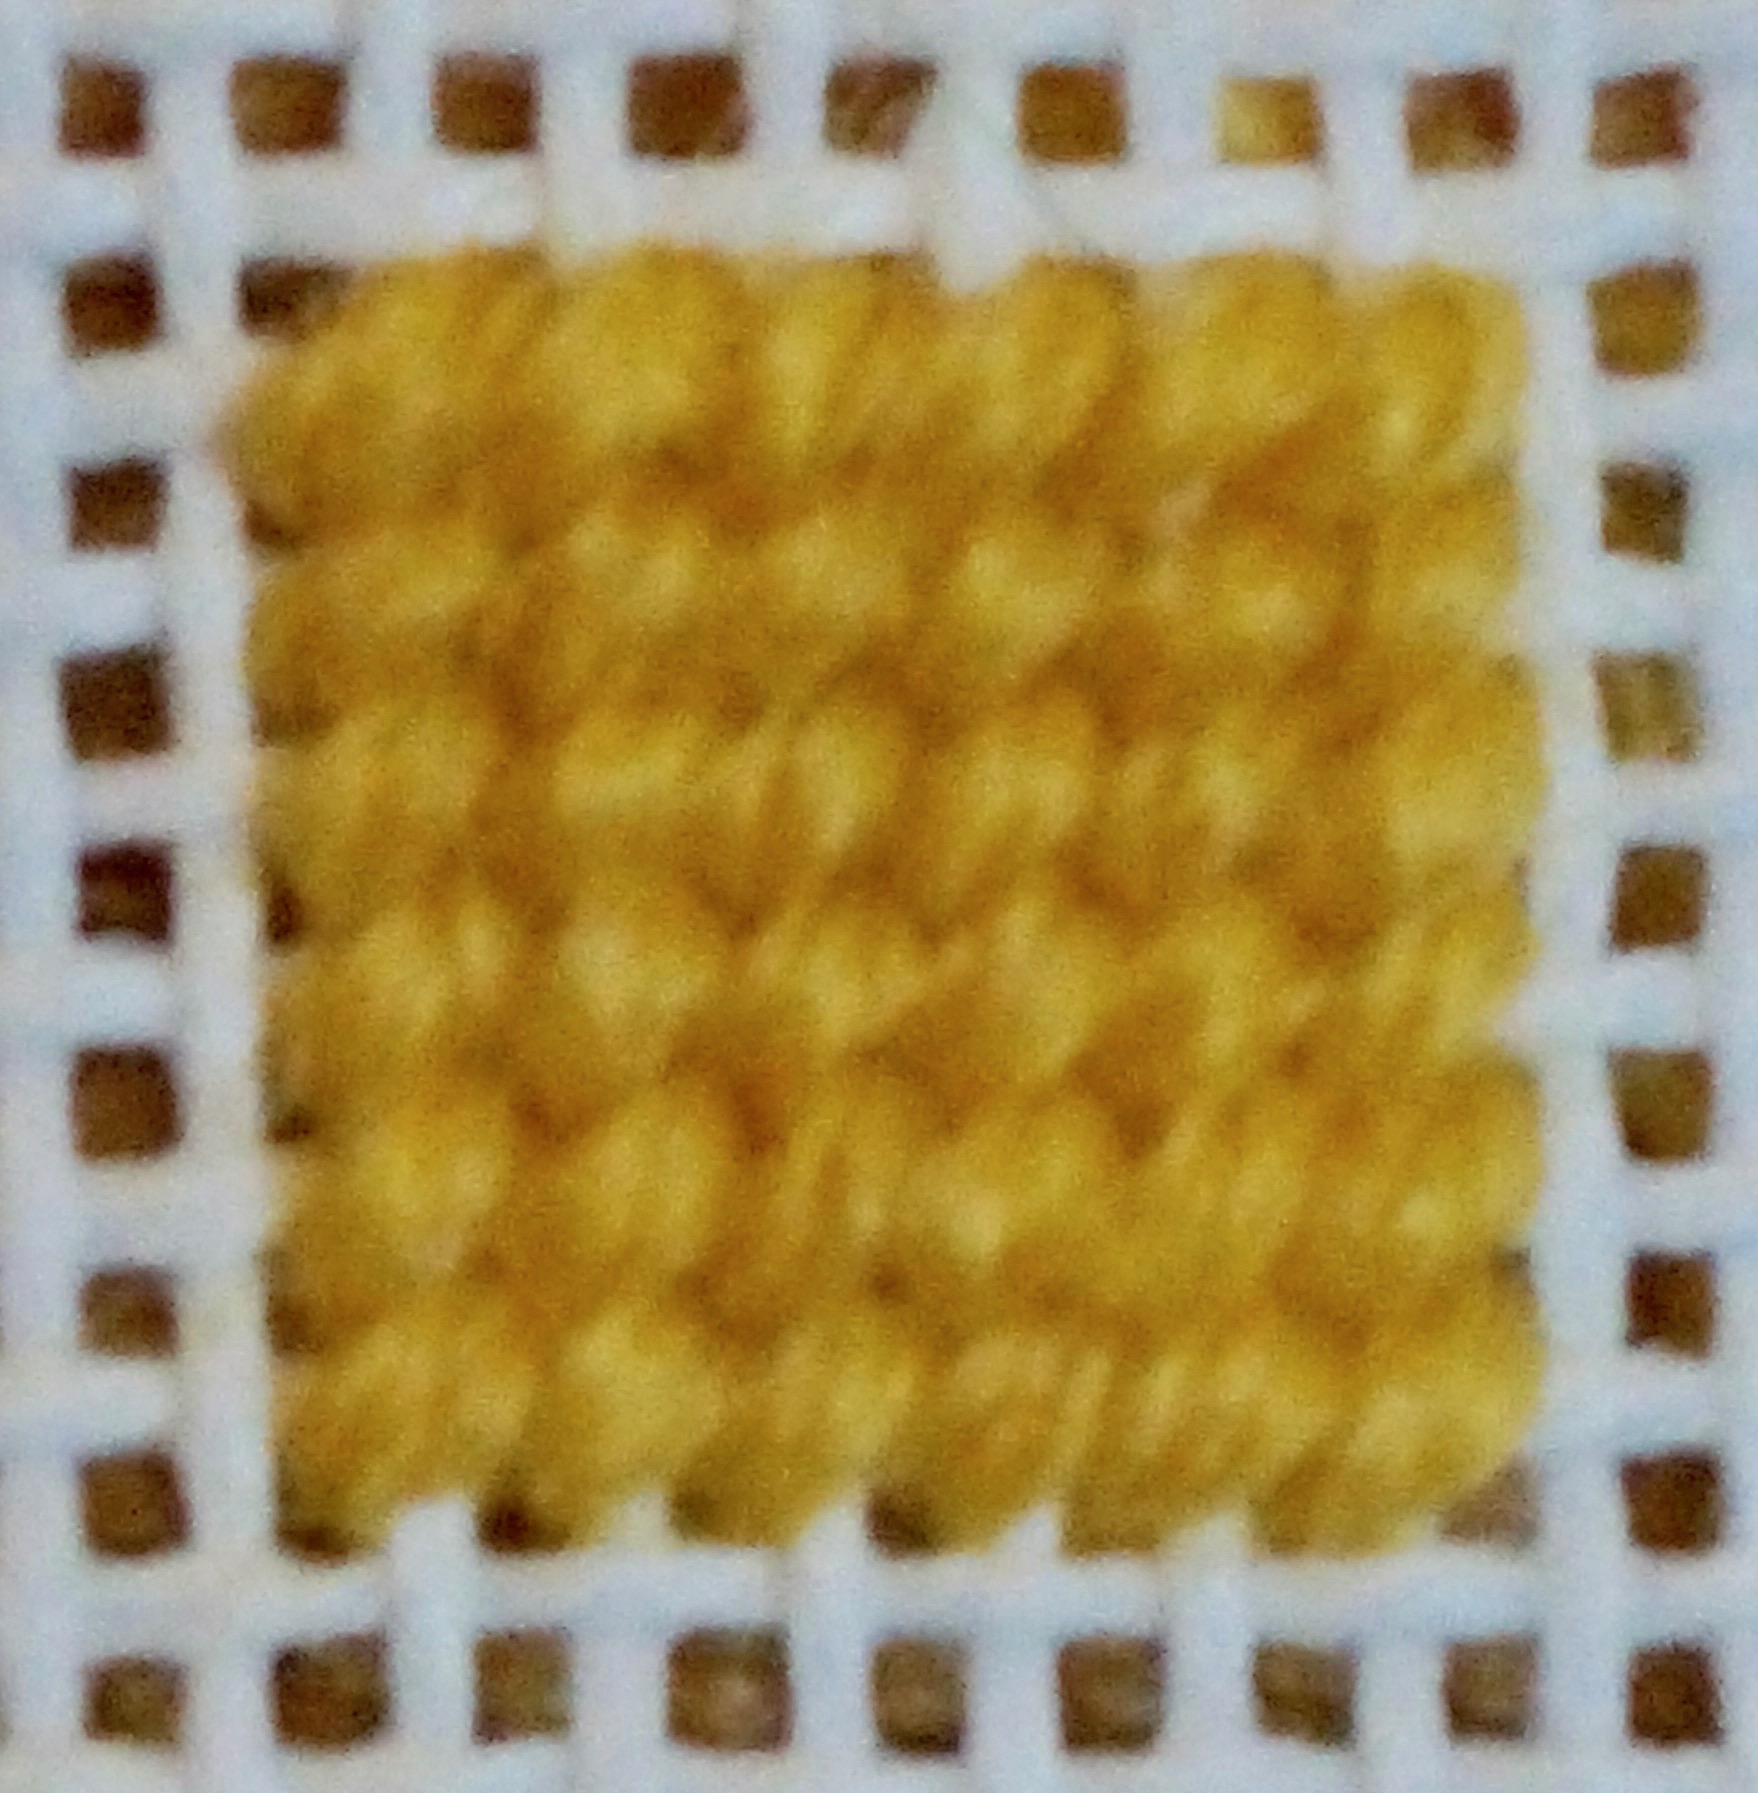
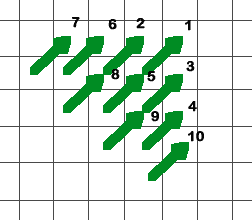
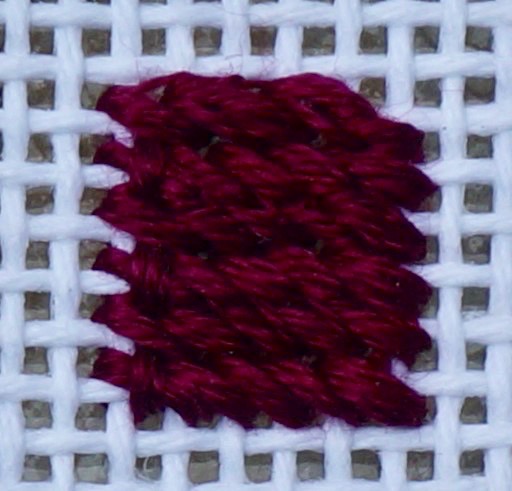
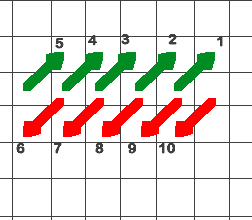
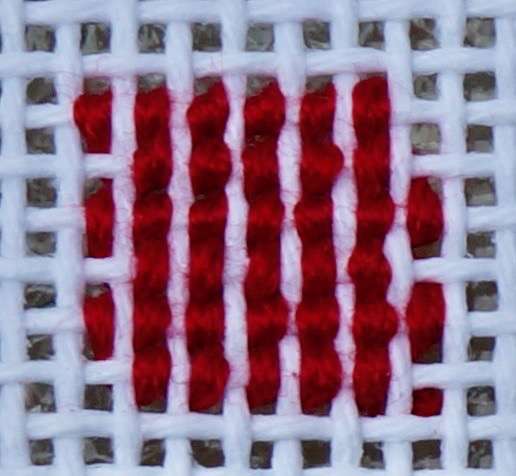
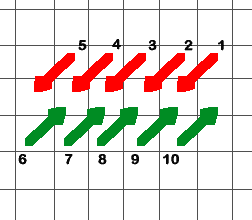
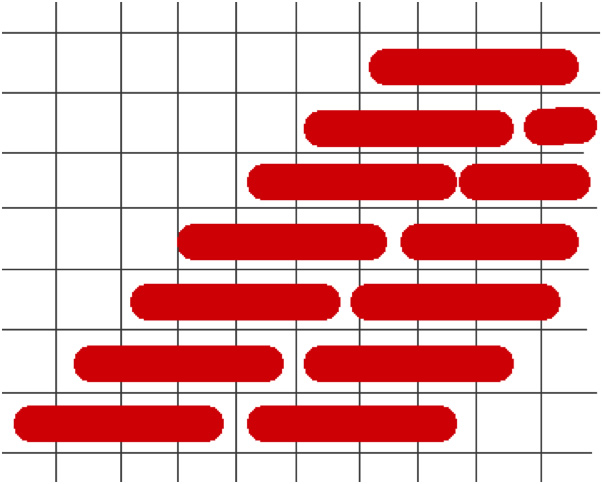
Instead of using the traditional needlepoint binding stitch, I opted to using an overcast stitch so that I could finish the edges in multiple colors. The stitches were worked on four strands of canvas folded so that there are two stands on the front side and two on the back. In this example, every other stitch is one in red and then followed with every other stitch in blue.

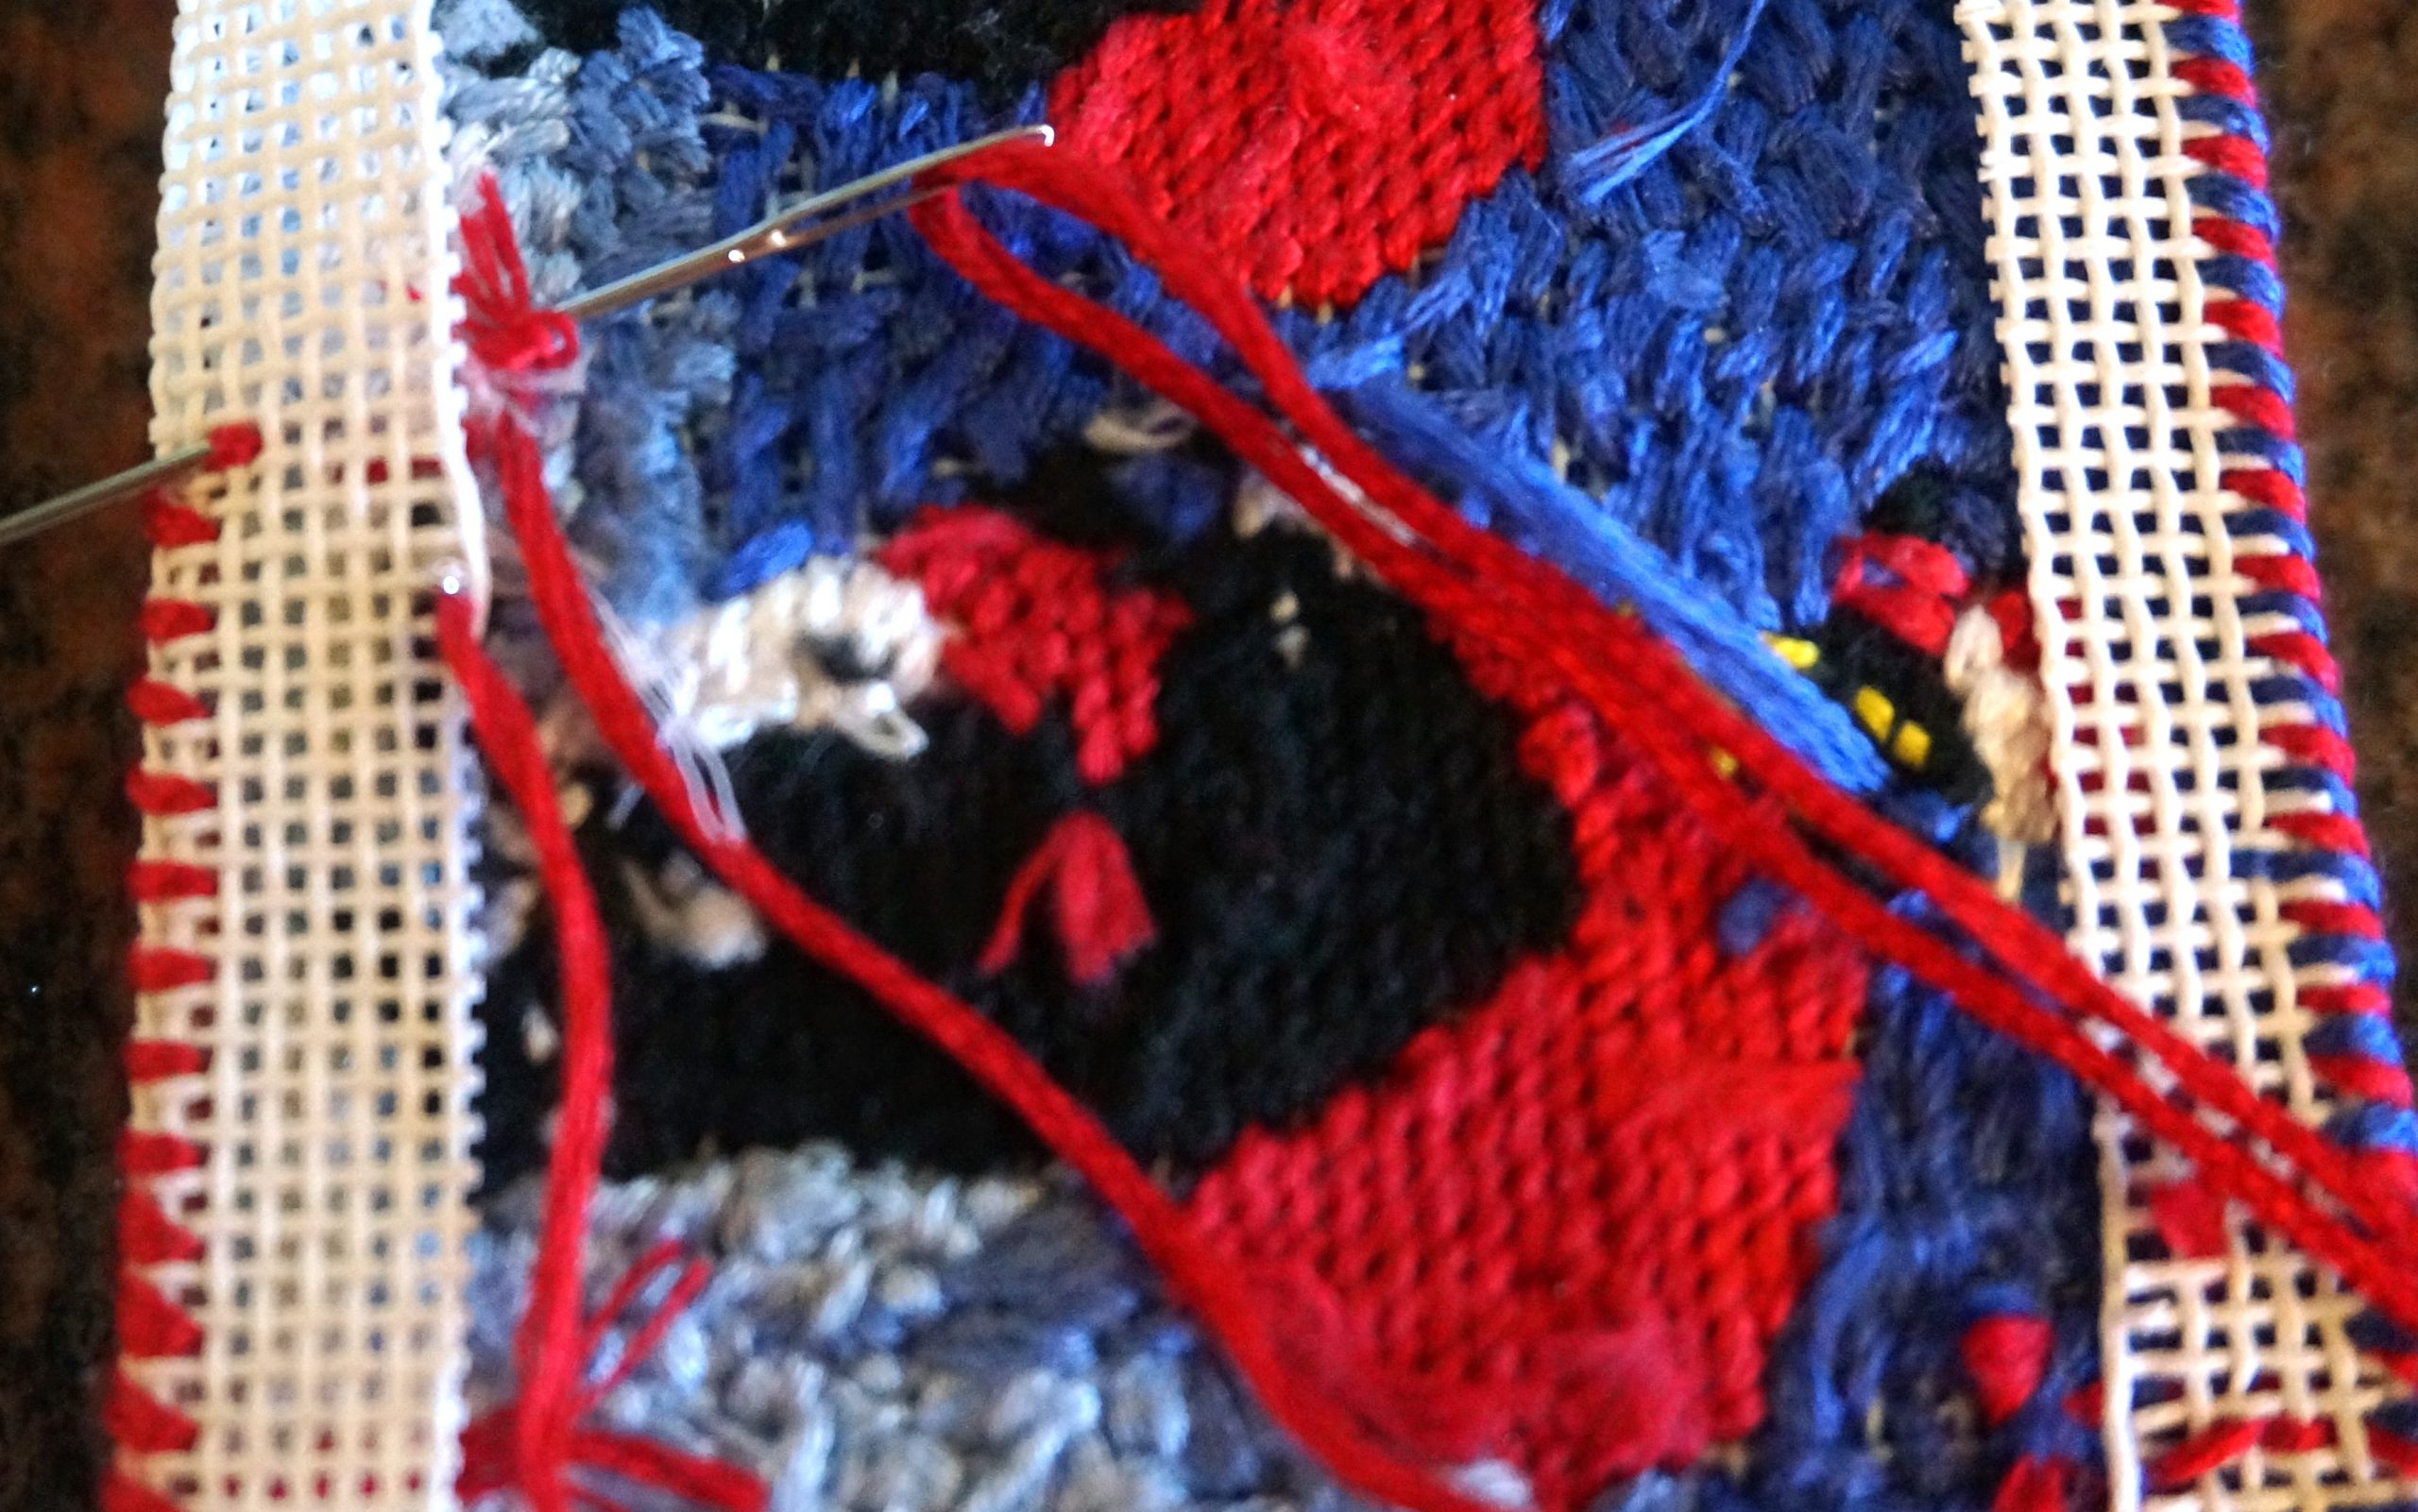
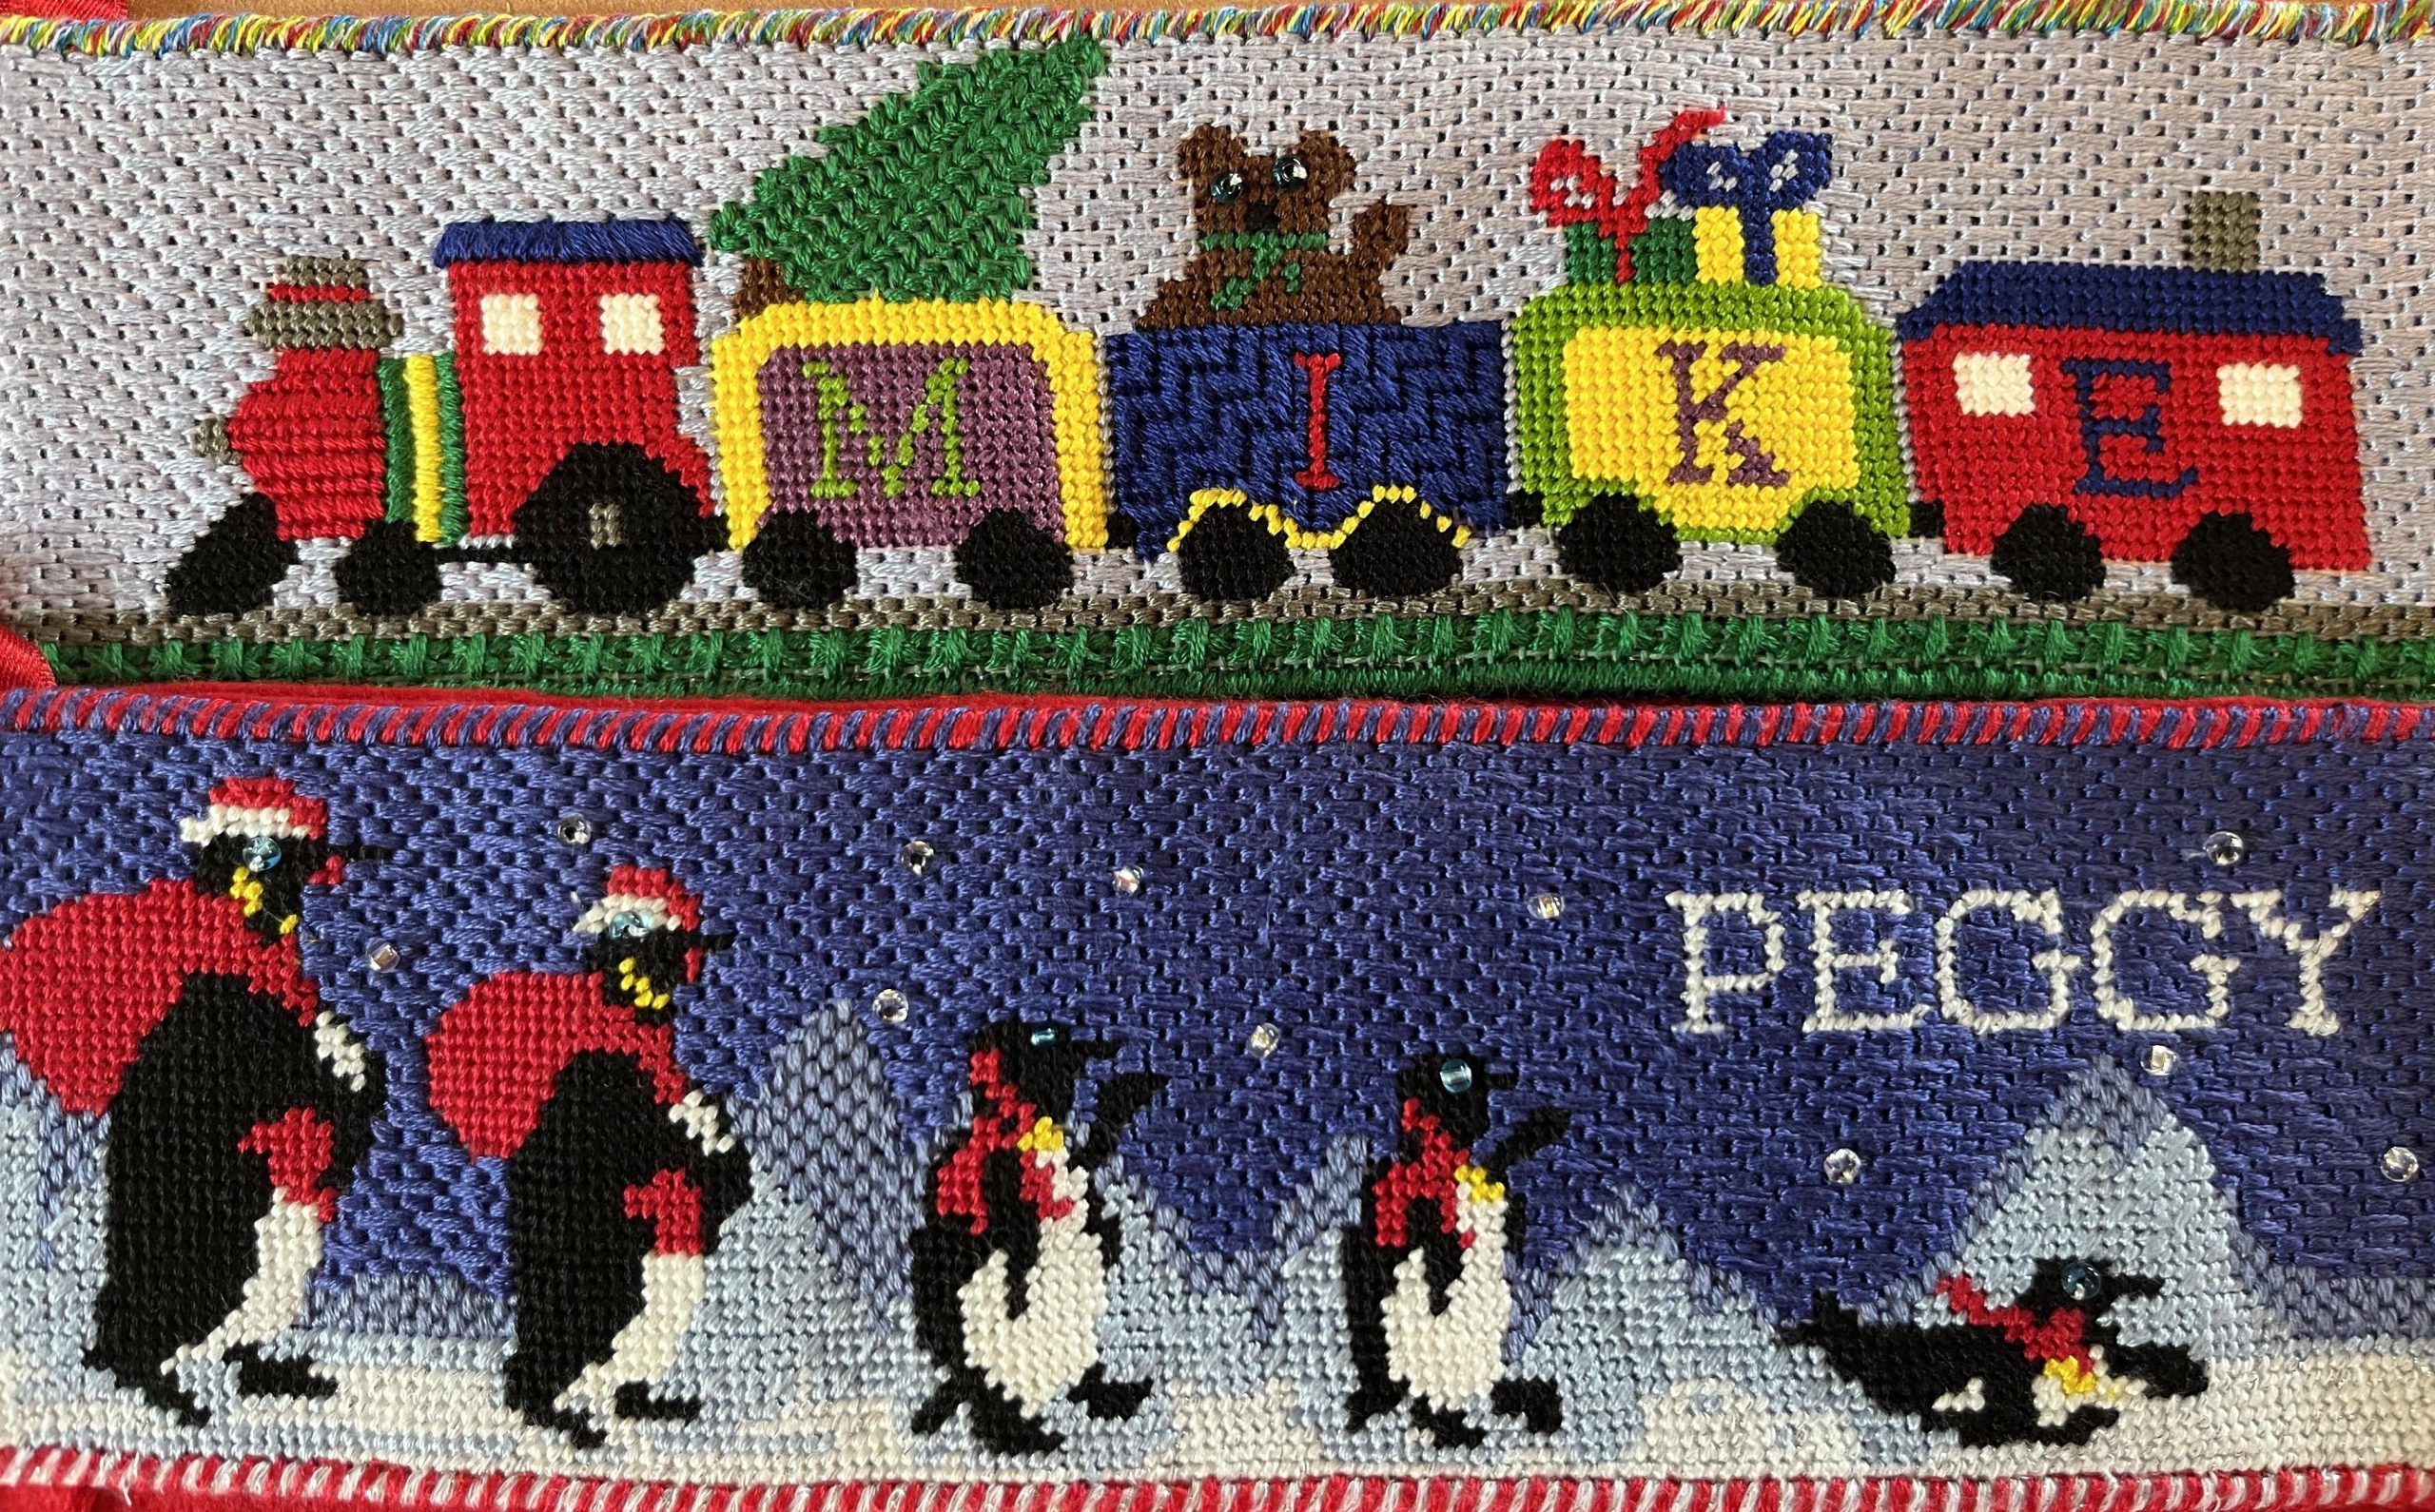
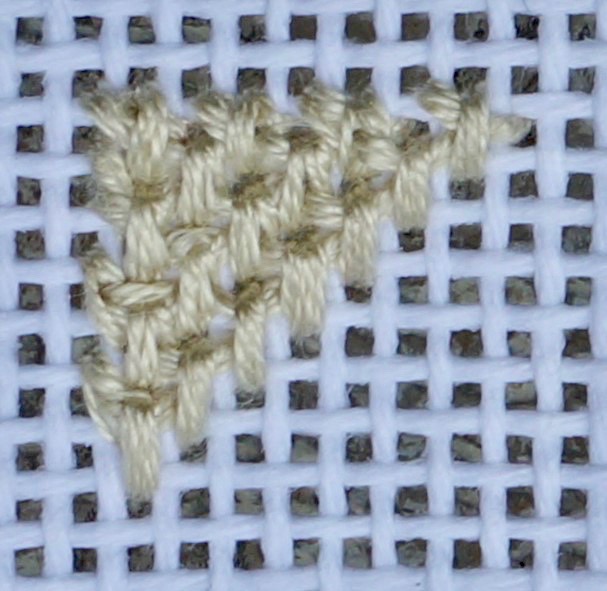
This is the same technique that is used for sewing plastic canvas together, except you are working with a folded needlepoint canvas instead of two pieces of plastic canvas. The color variations give the canvas an additional dimension. And, on the train canvas, I used the same stitch with six different colored strands of embroidery floss on the needle. 

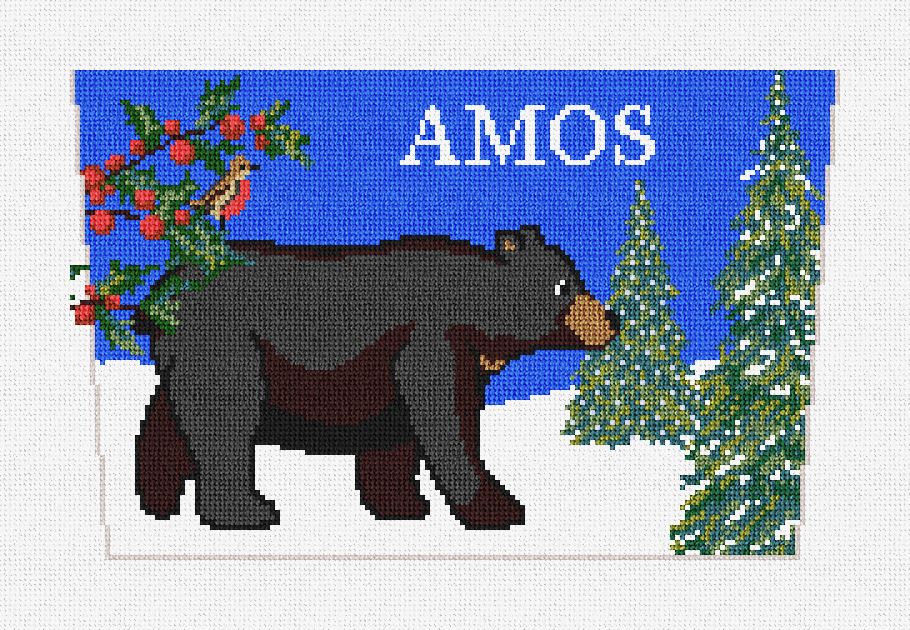
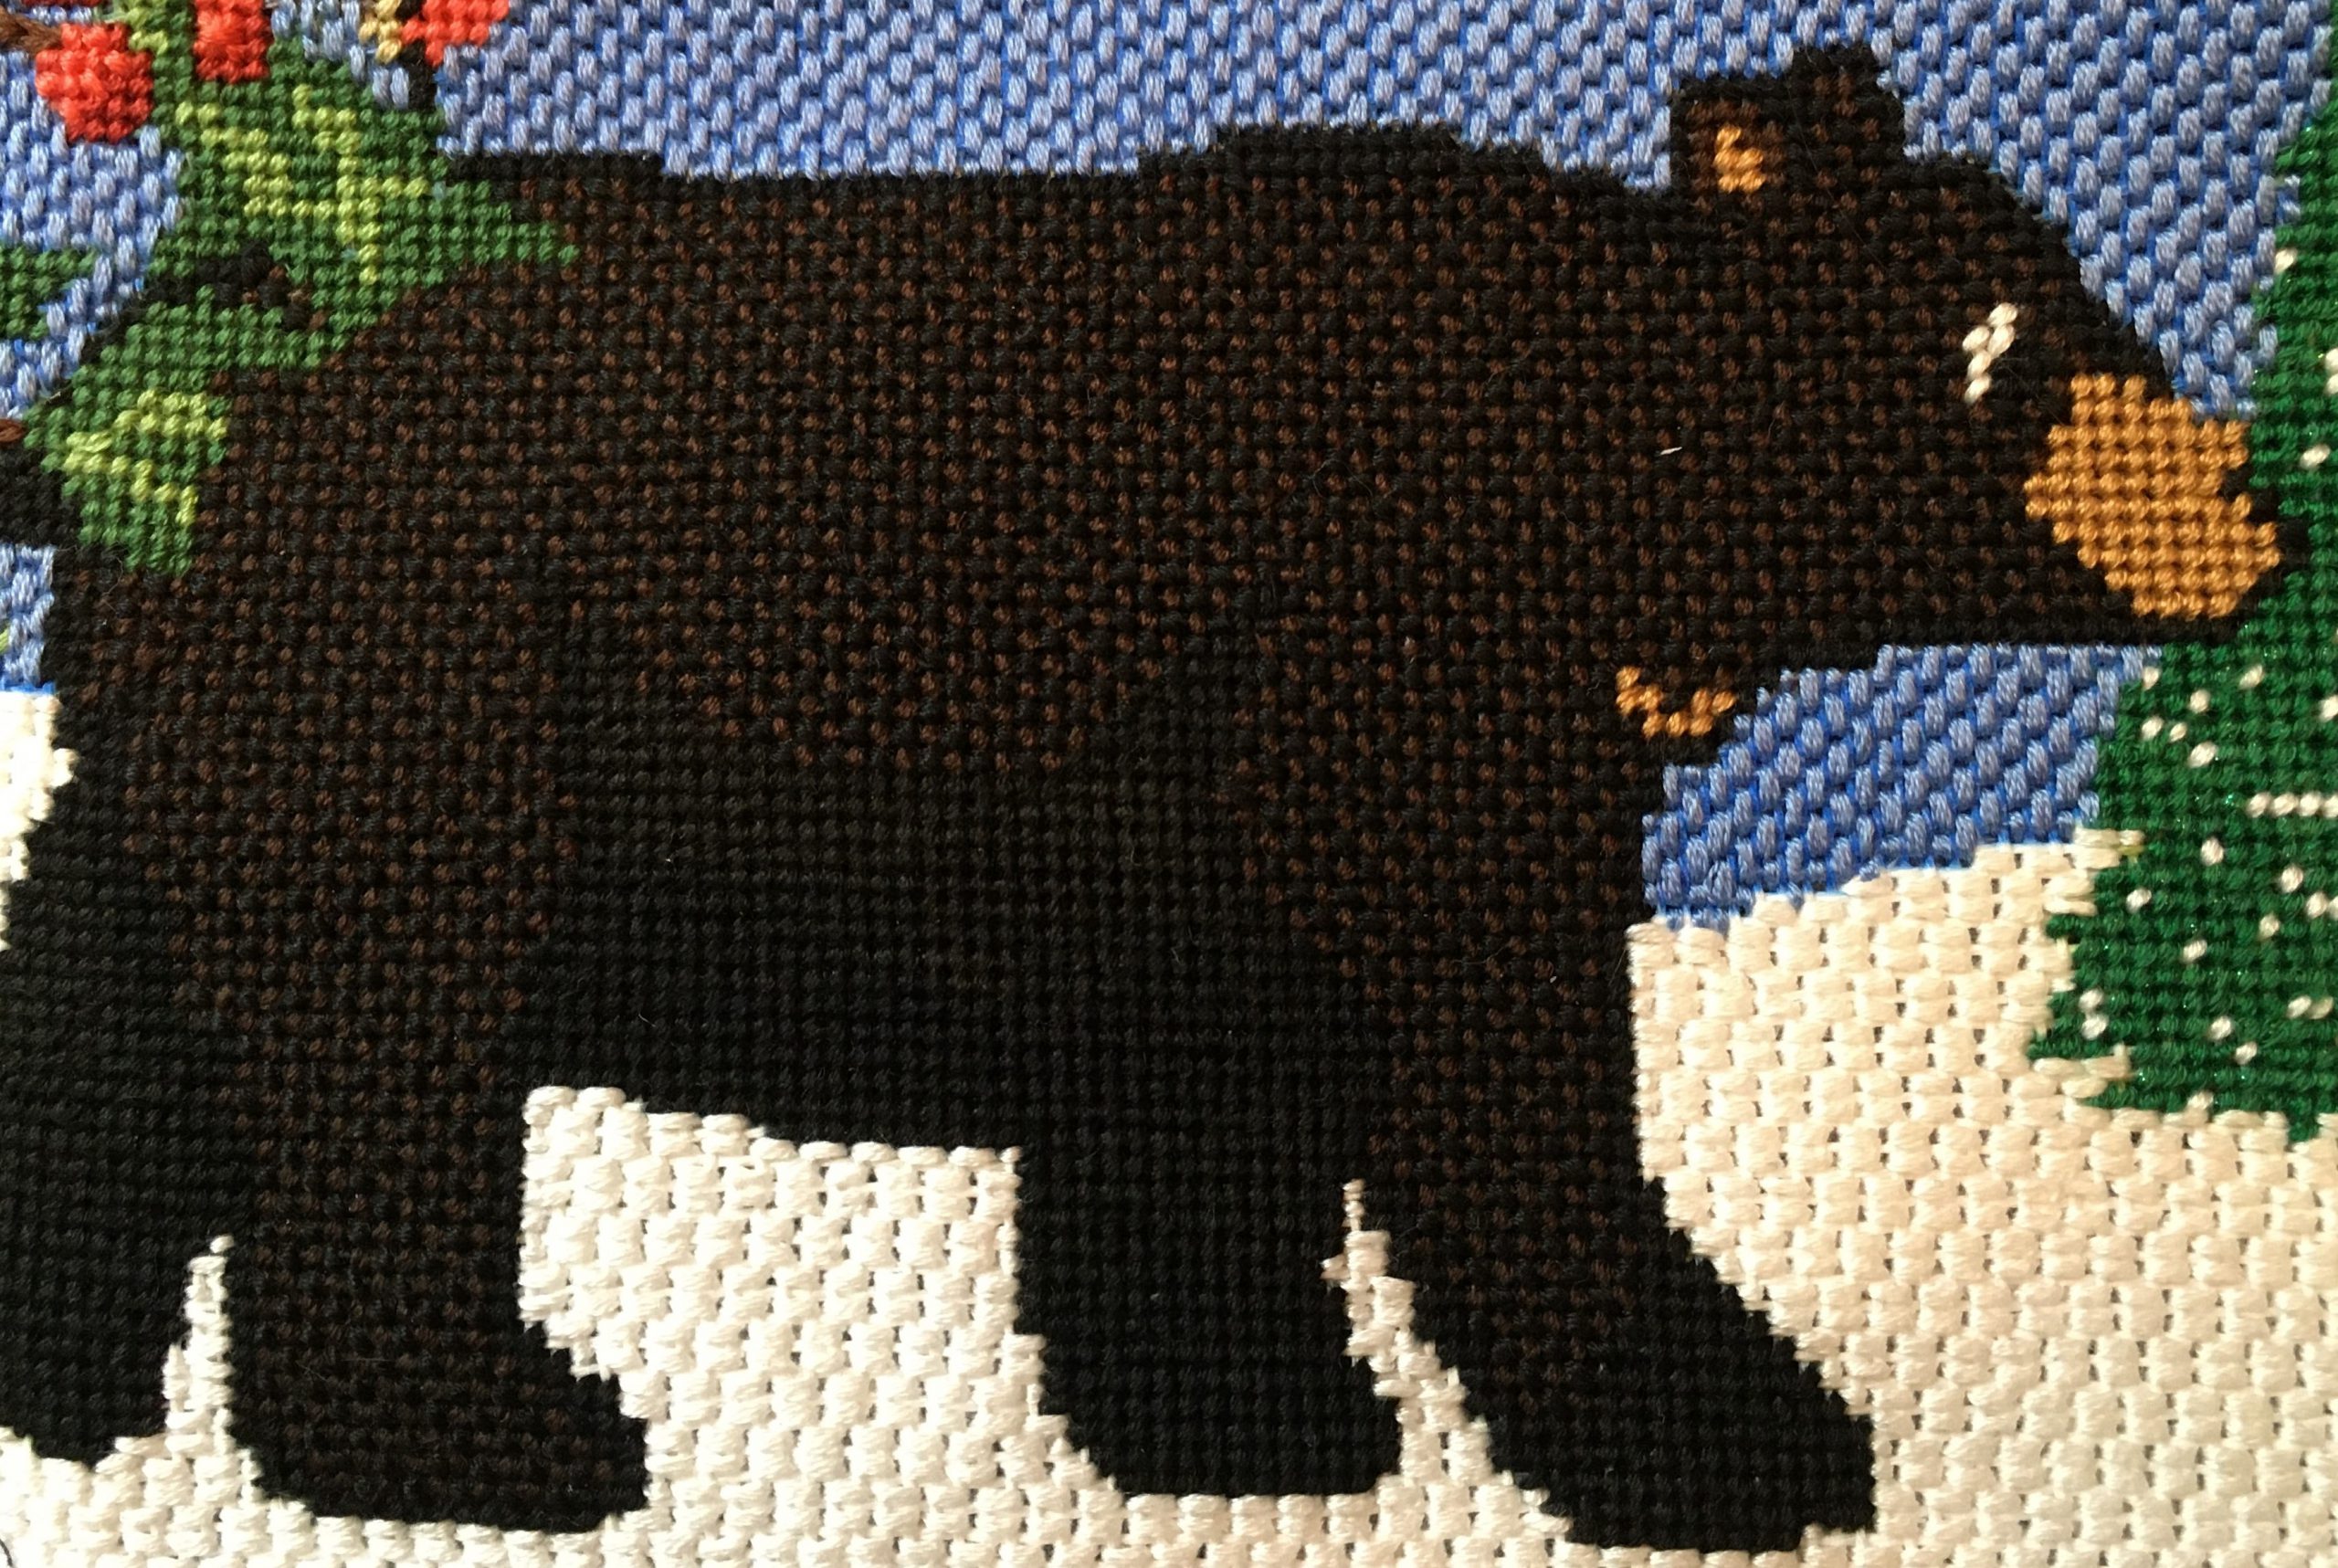
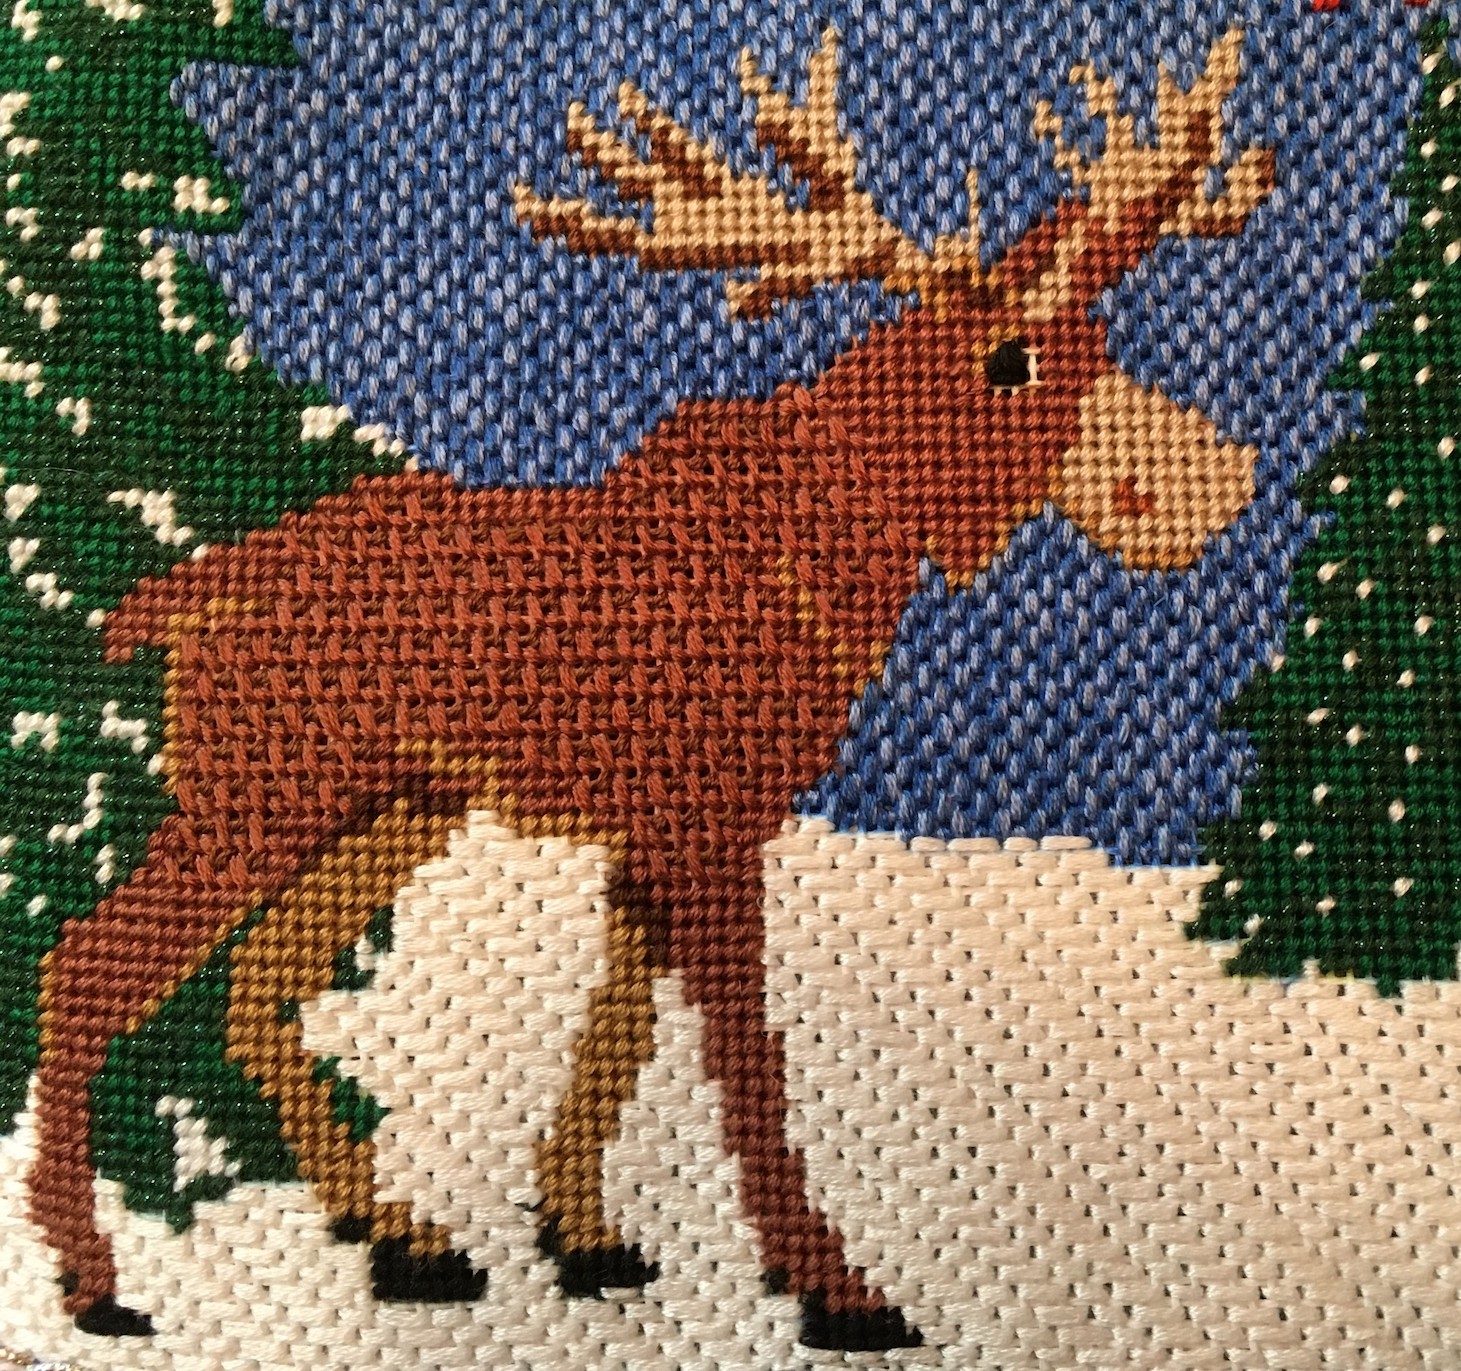
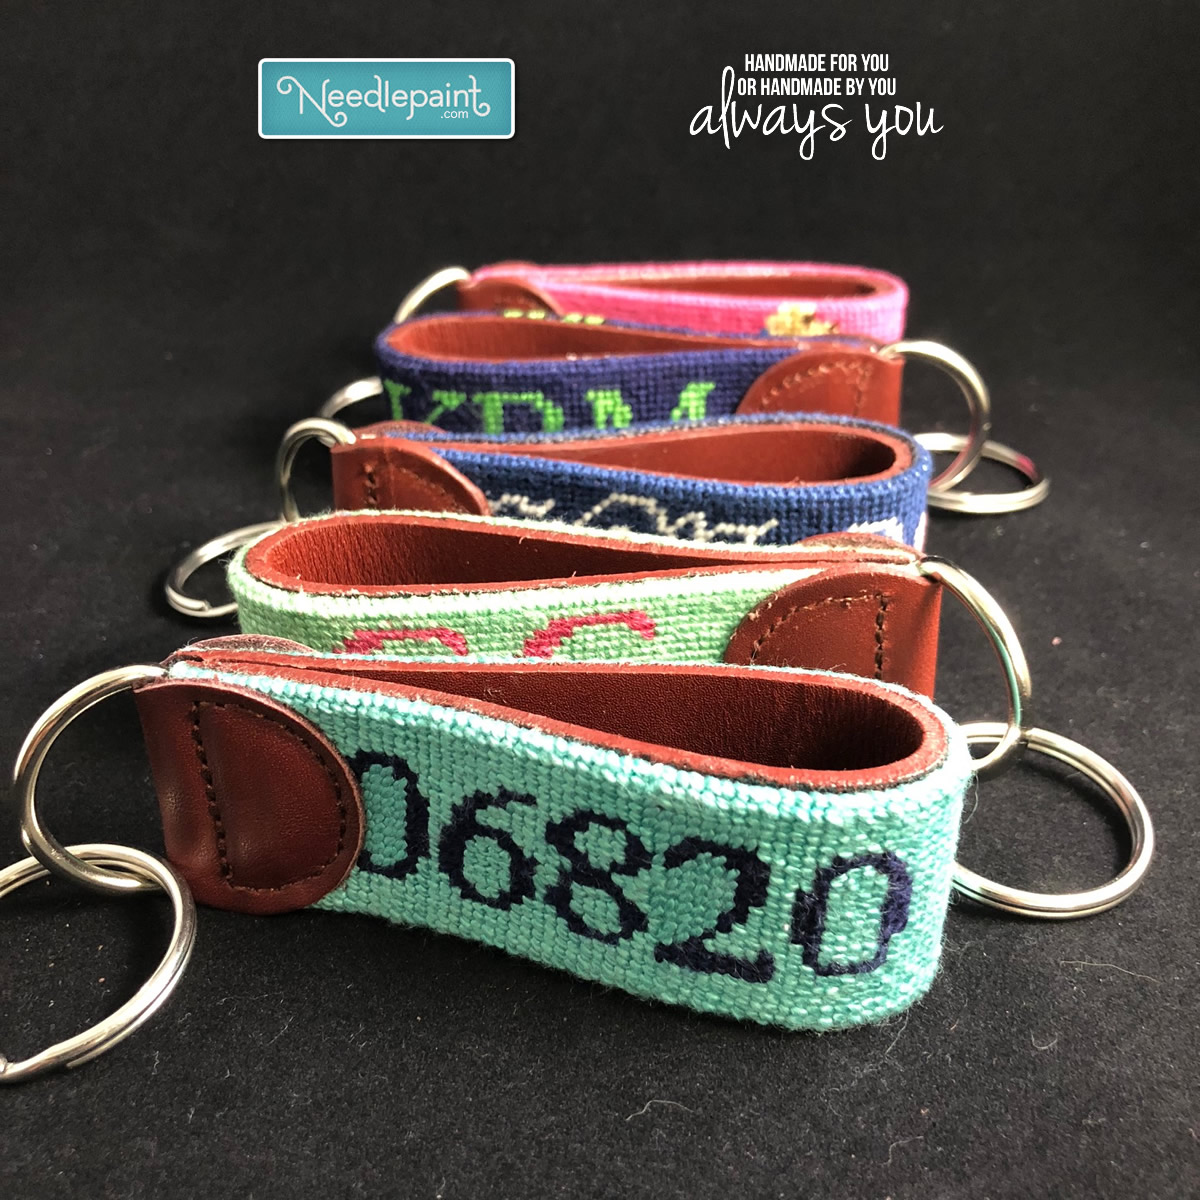
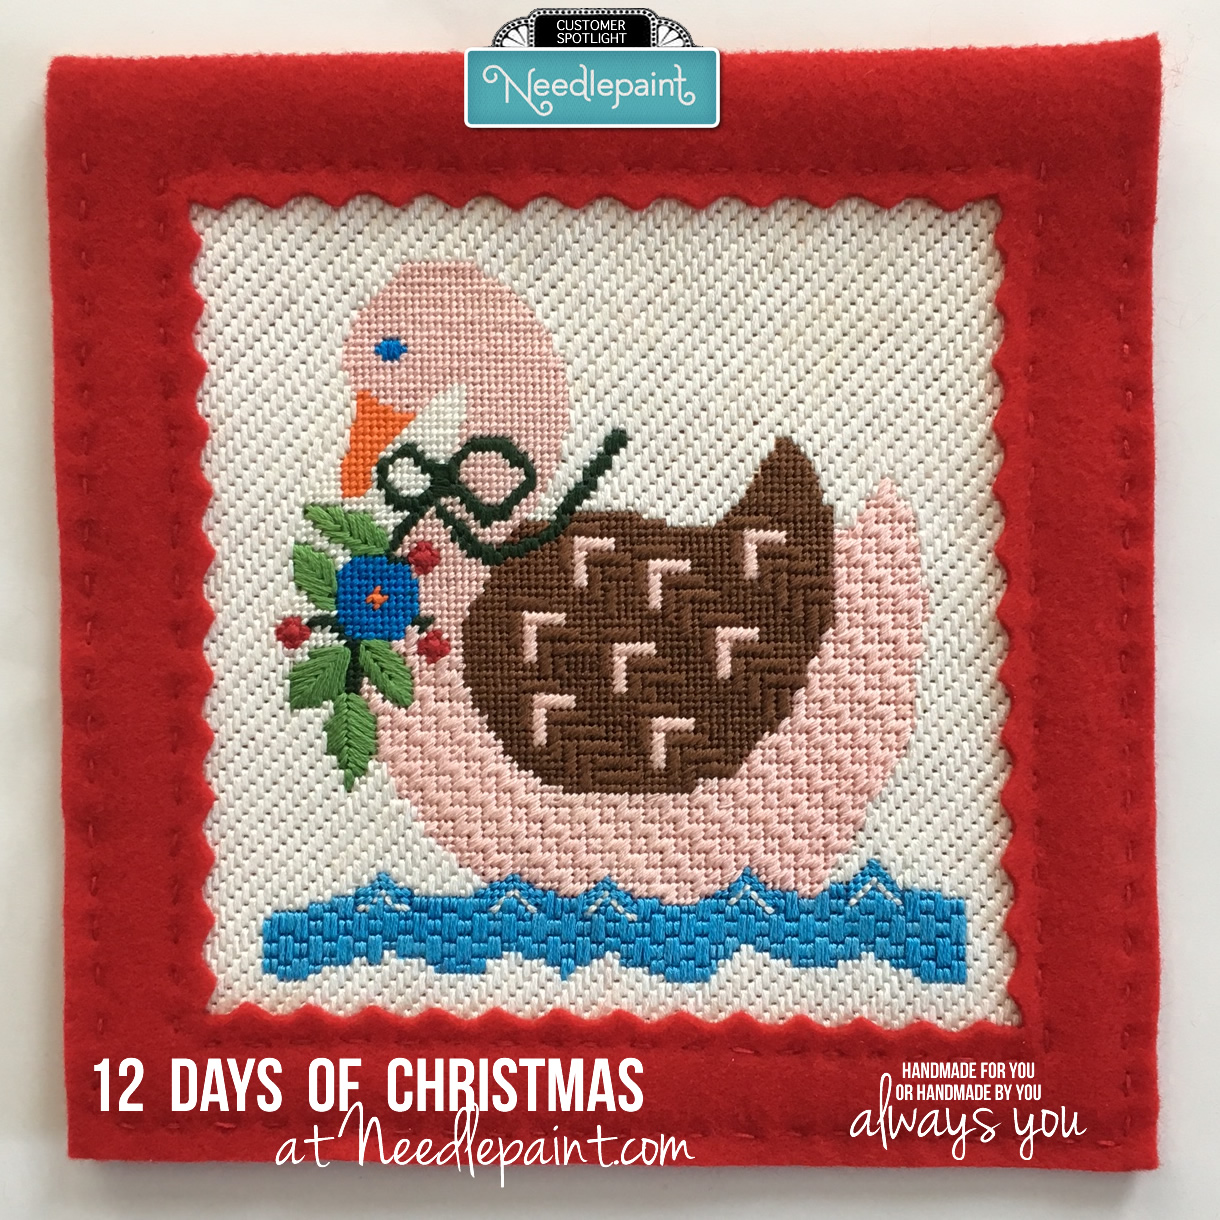
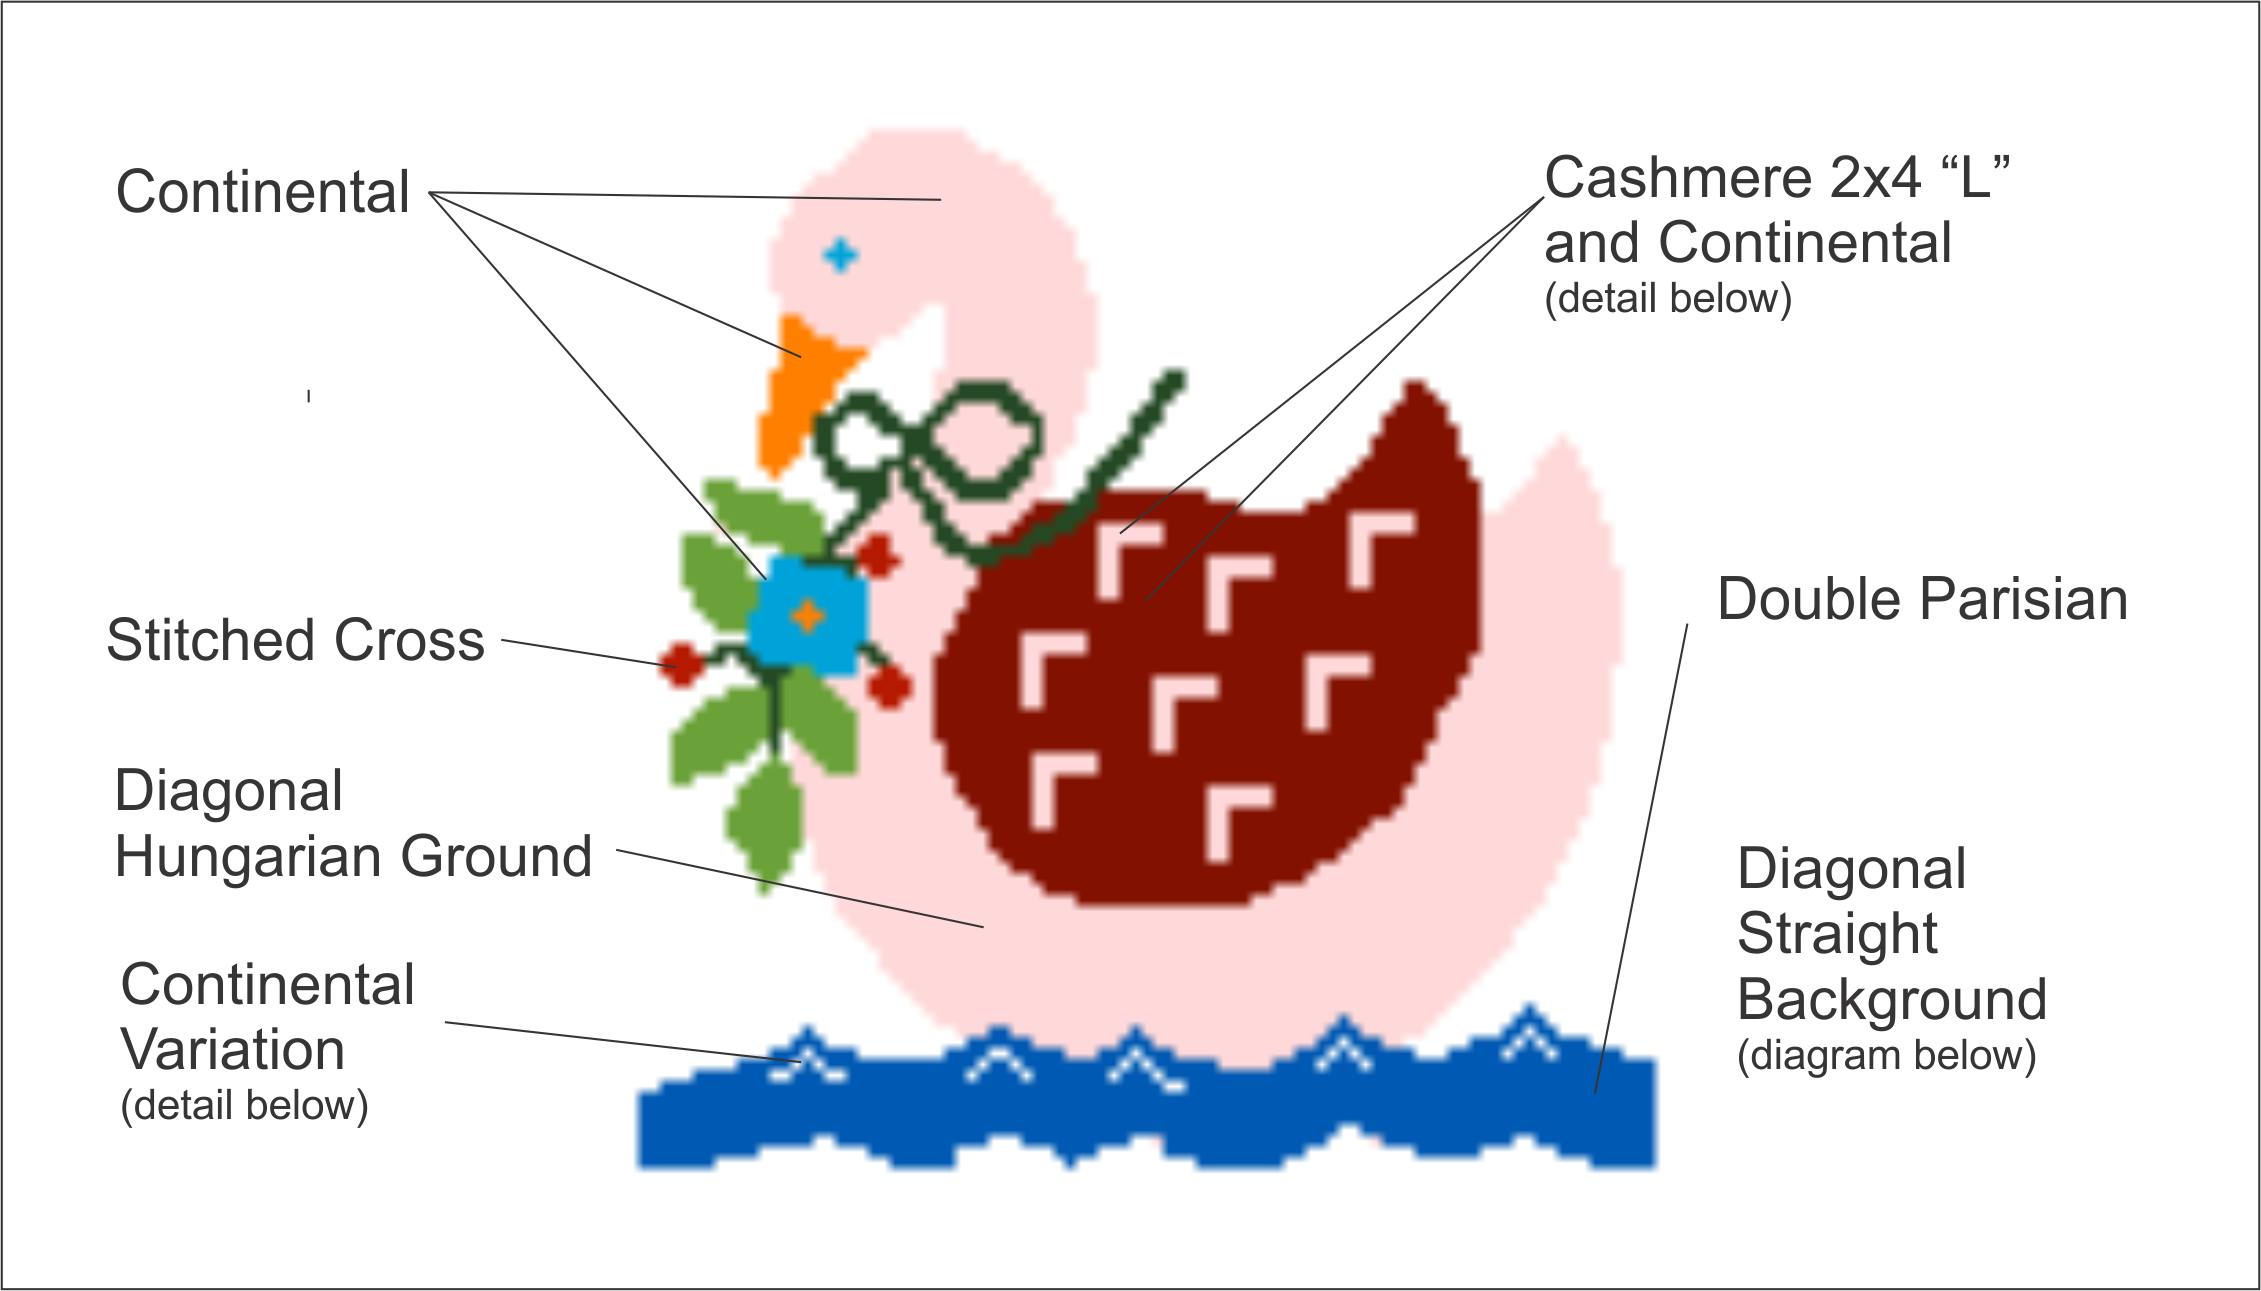
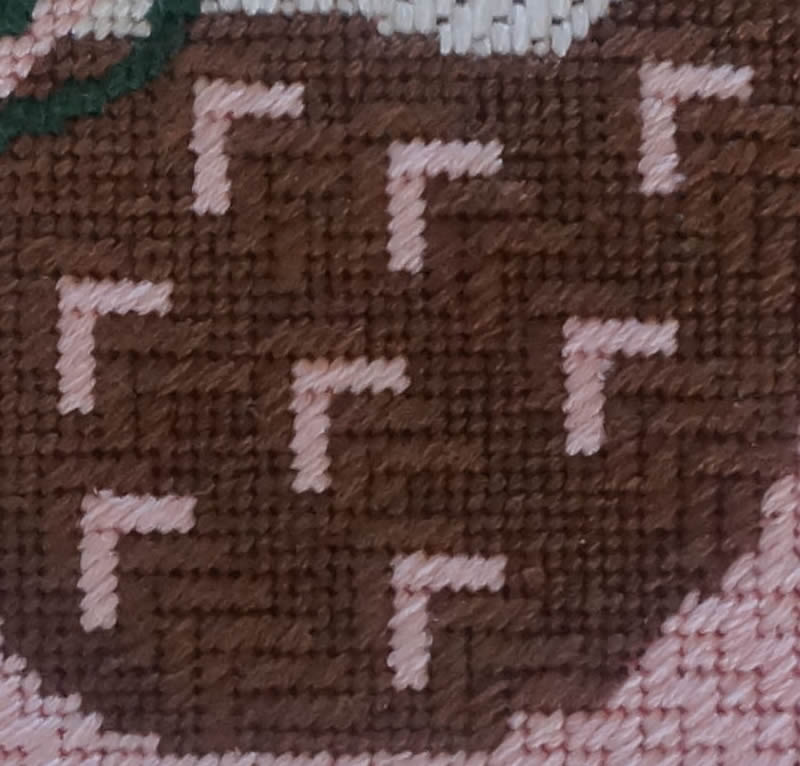
I have had request for cuffs from friends and family and have adapted several more of the original ornaments to cuffs. Each can be customized with a name. All are 18 mesh canvas designs except for the final snowflake design which is 14 mesh canvas.

Angel Song Stocking Cuff Needlepoint Kit

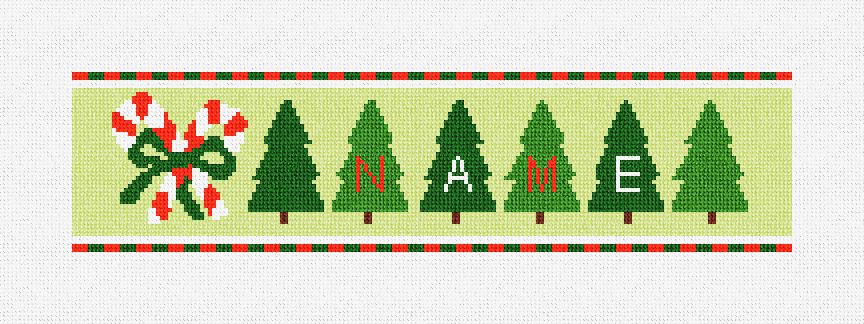
Candy Cane Stocking Cuff Needlepoint Kit

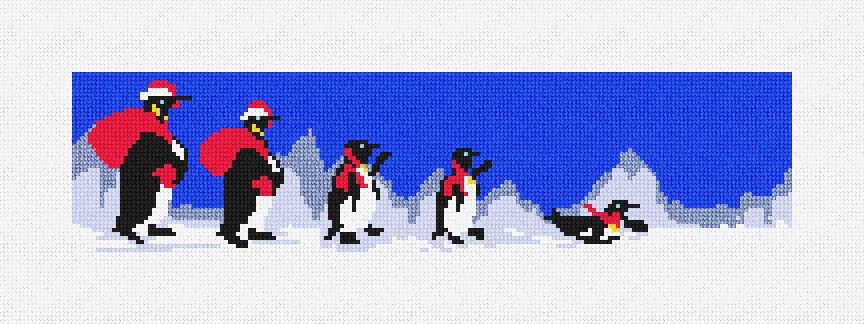
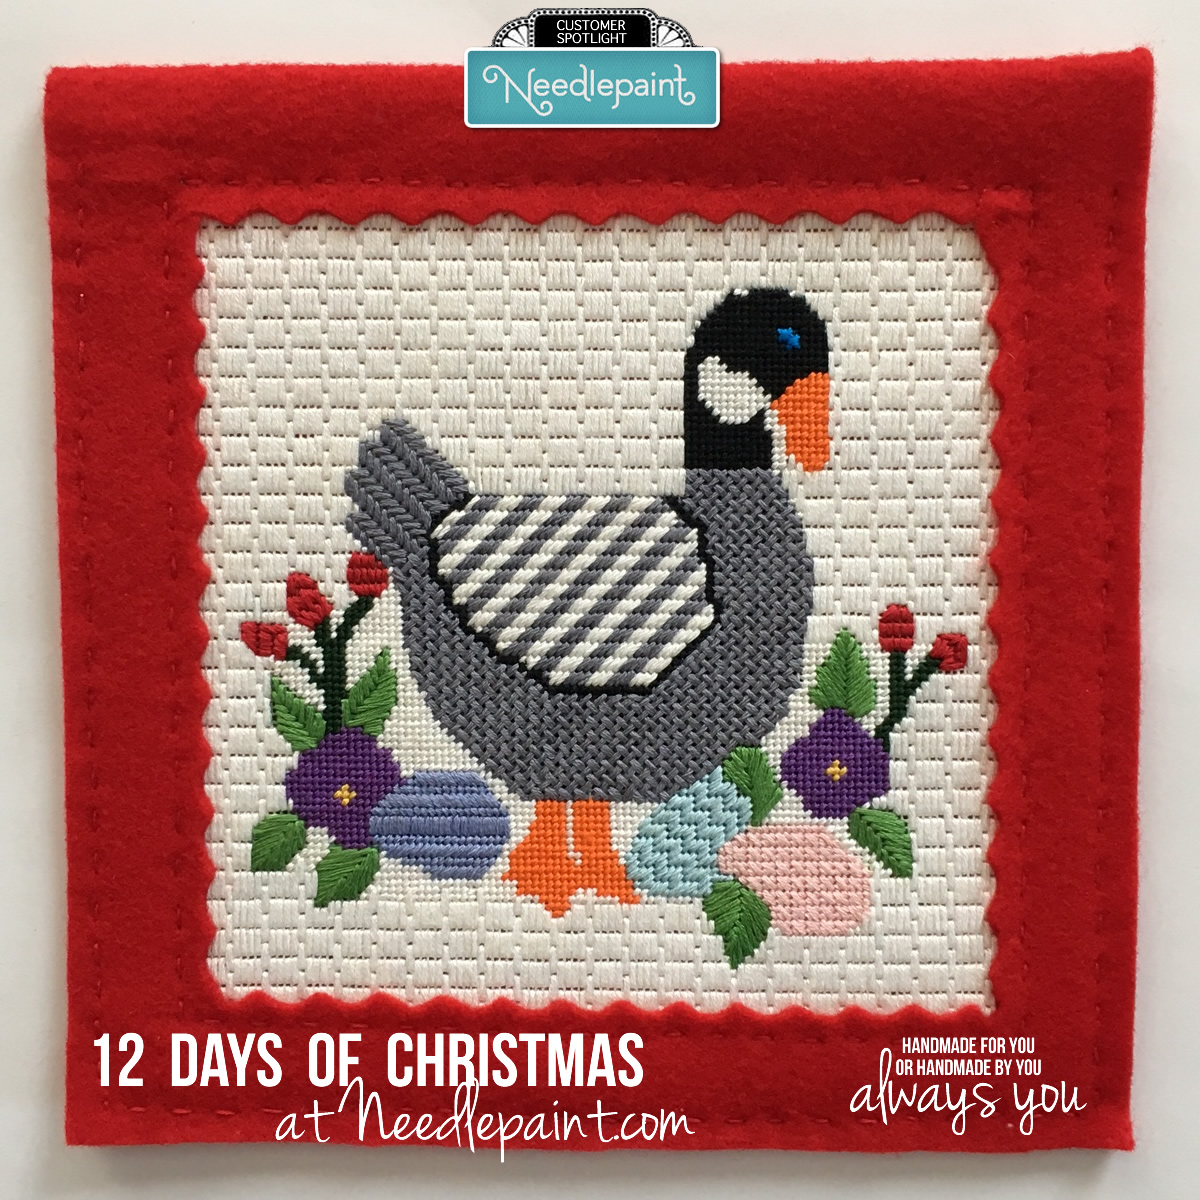
Penguin Parade Stocking Cuff Needlepoint Kit

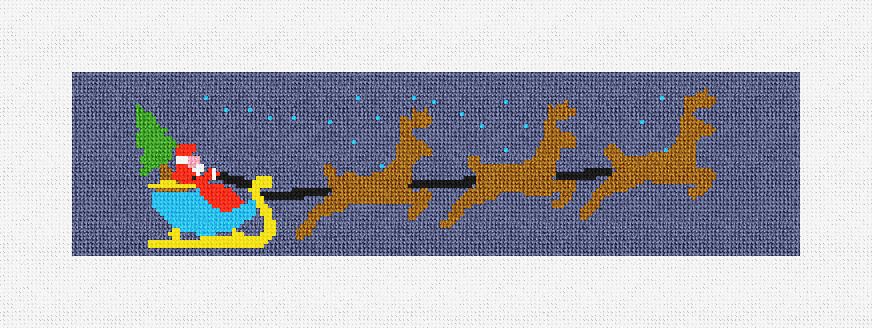
Holiday Sleigh Stocking Cuff Needlepoint Kit

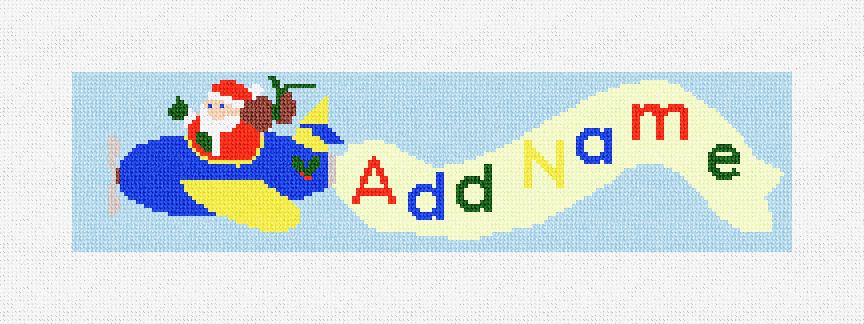
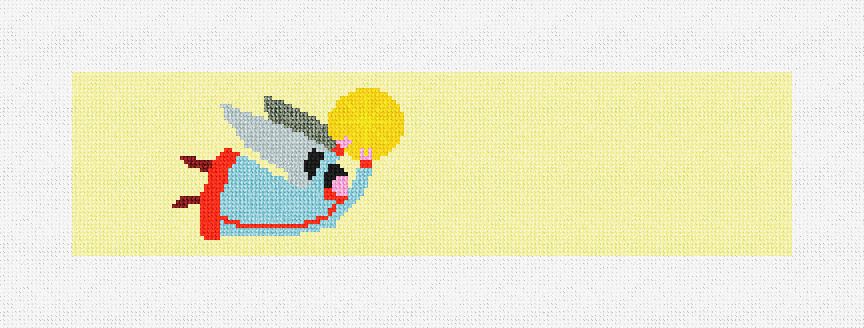
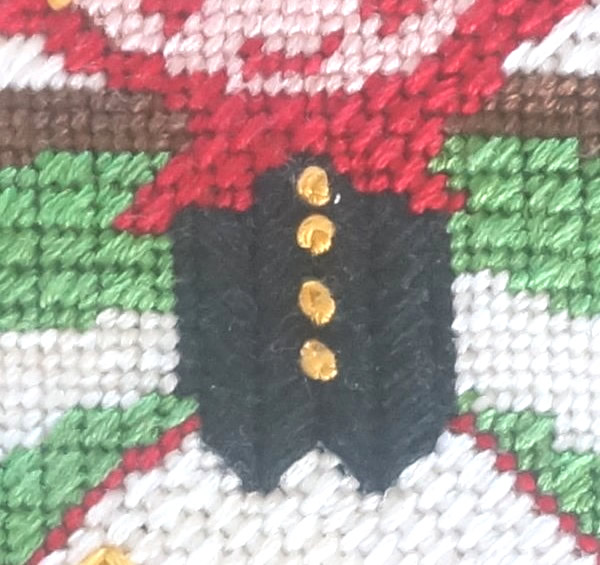
Flying Santa Stocking Cuff Needlepoint Kit

Ornaments Twinkle Stocking Cuff Needlepoint Kit

Gentle Snowflakes Stocking Cuff Needlepoint Kit

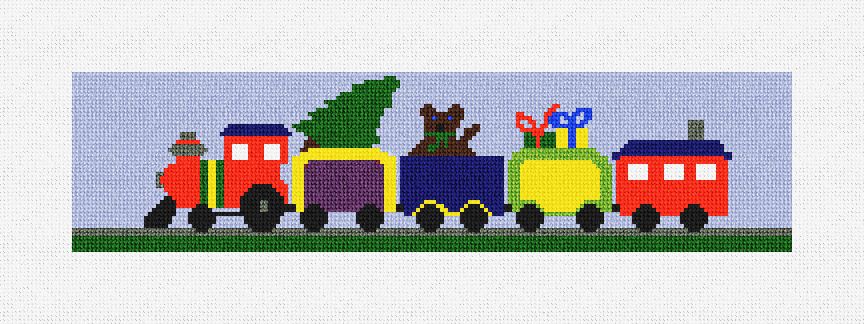
Holiday Express Stocking Cuff Needlepoint Kit

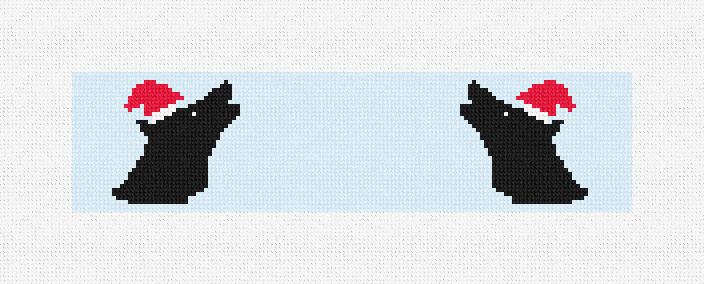
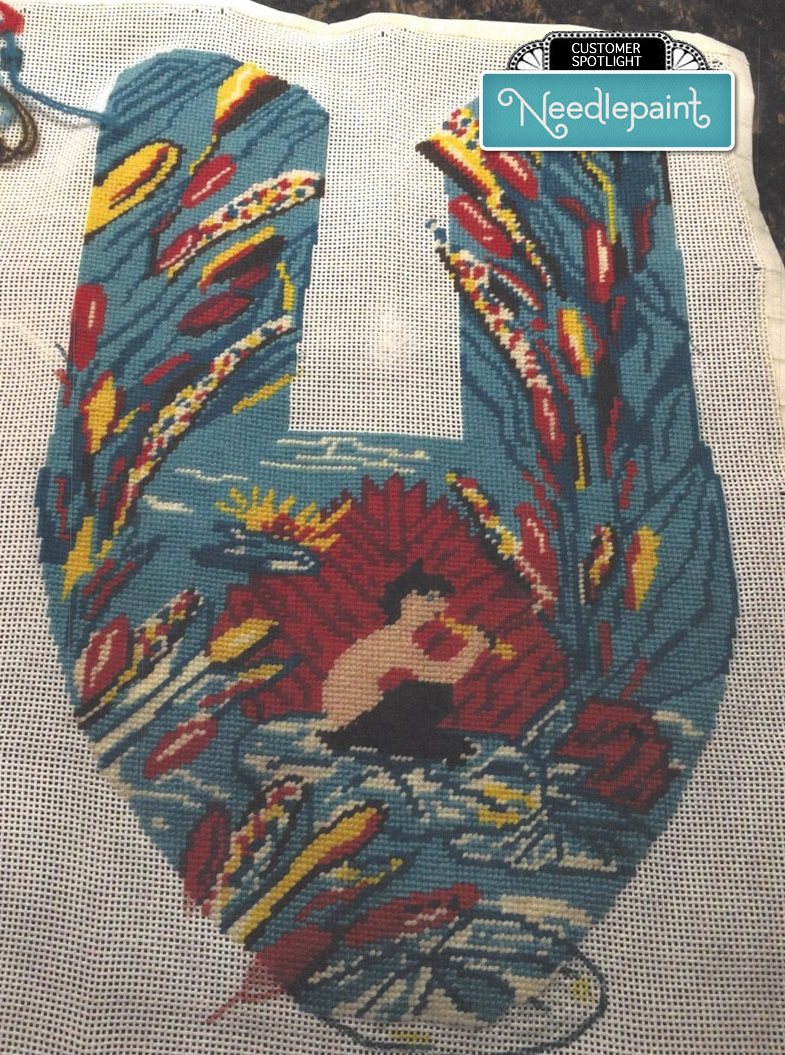
Wolf Song Stocking Cuff Needlepoint Kit

It’s never too late for Christmas stockings and the finishing of these is quick and easy.
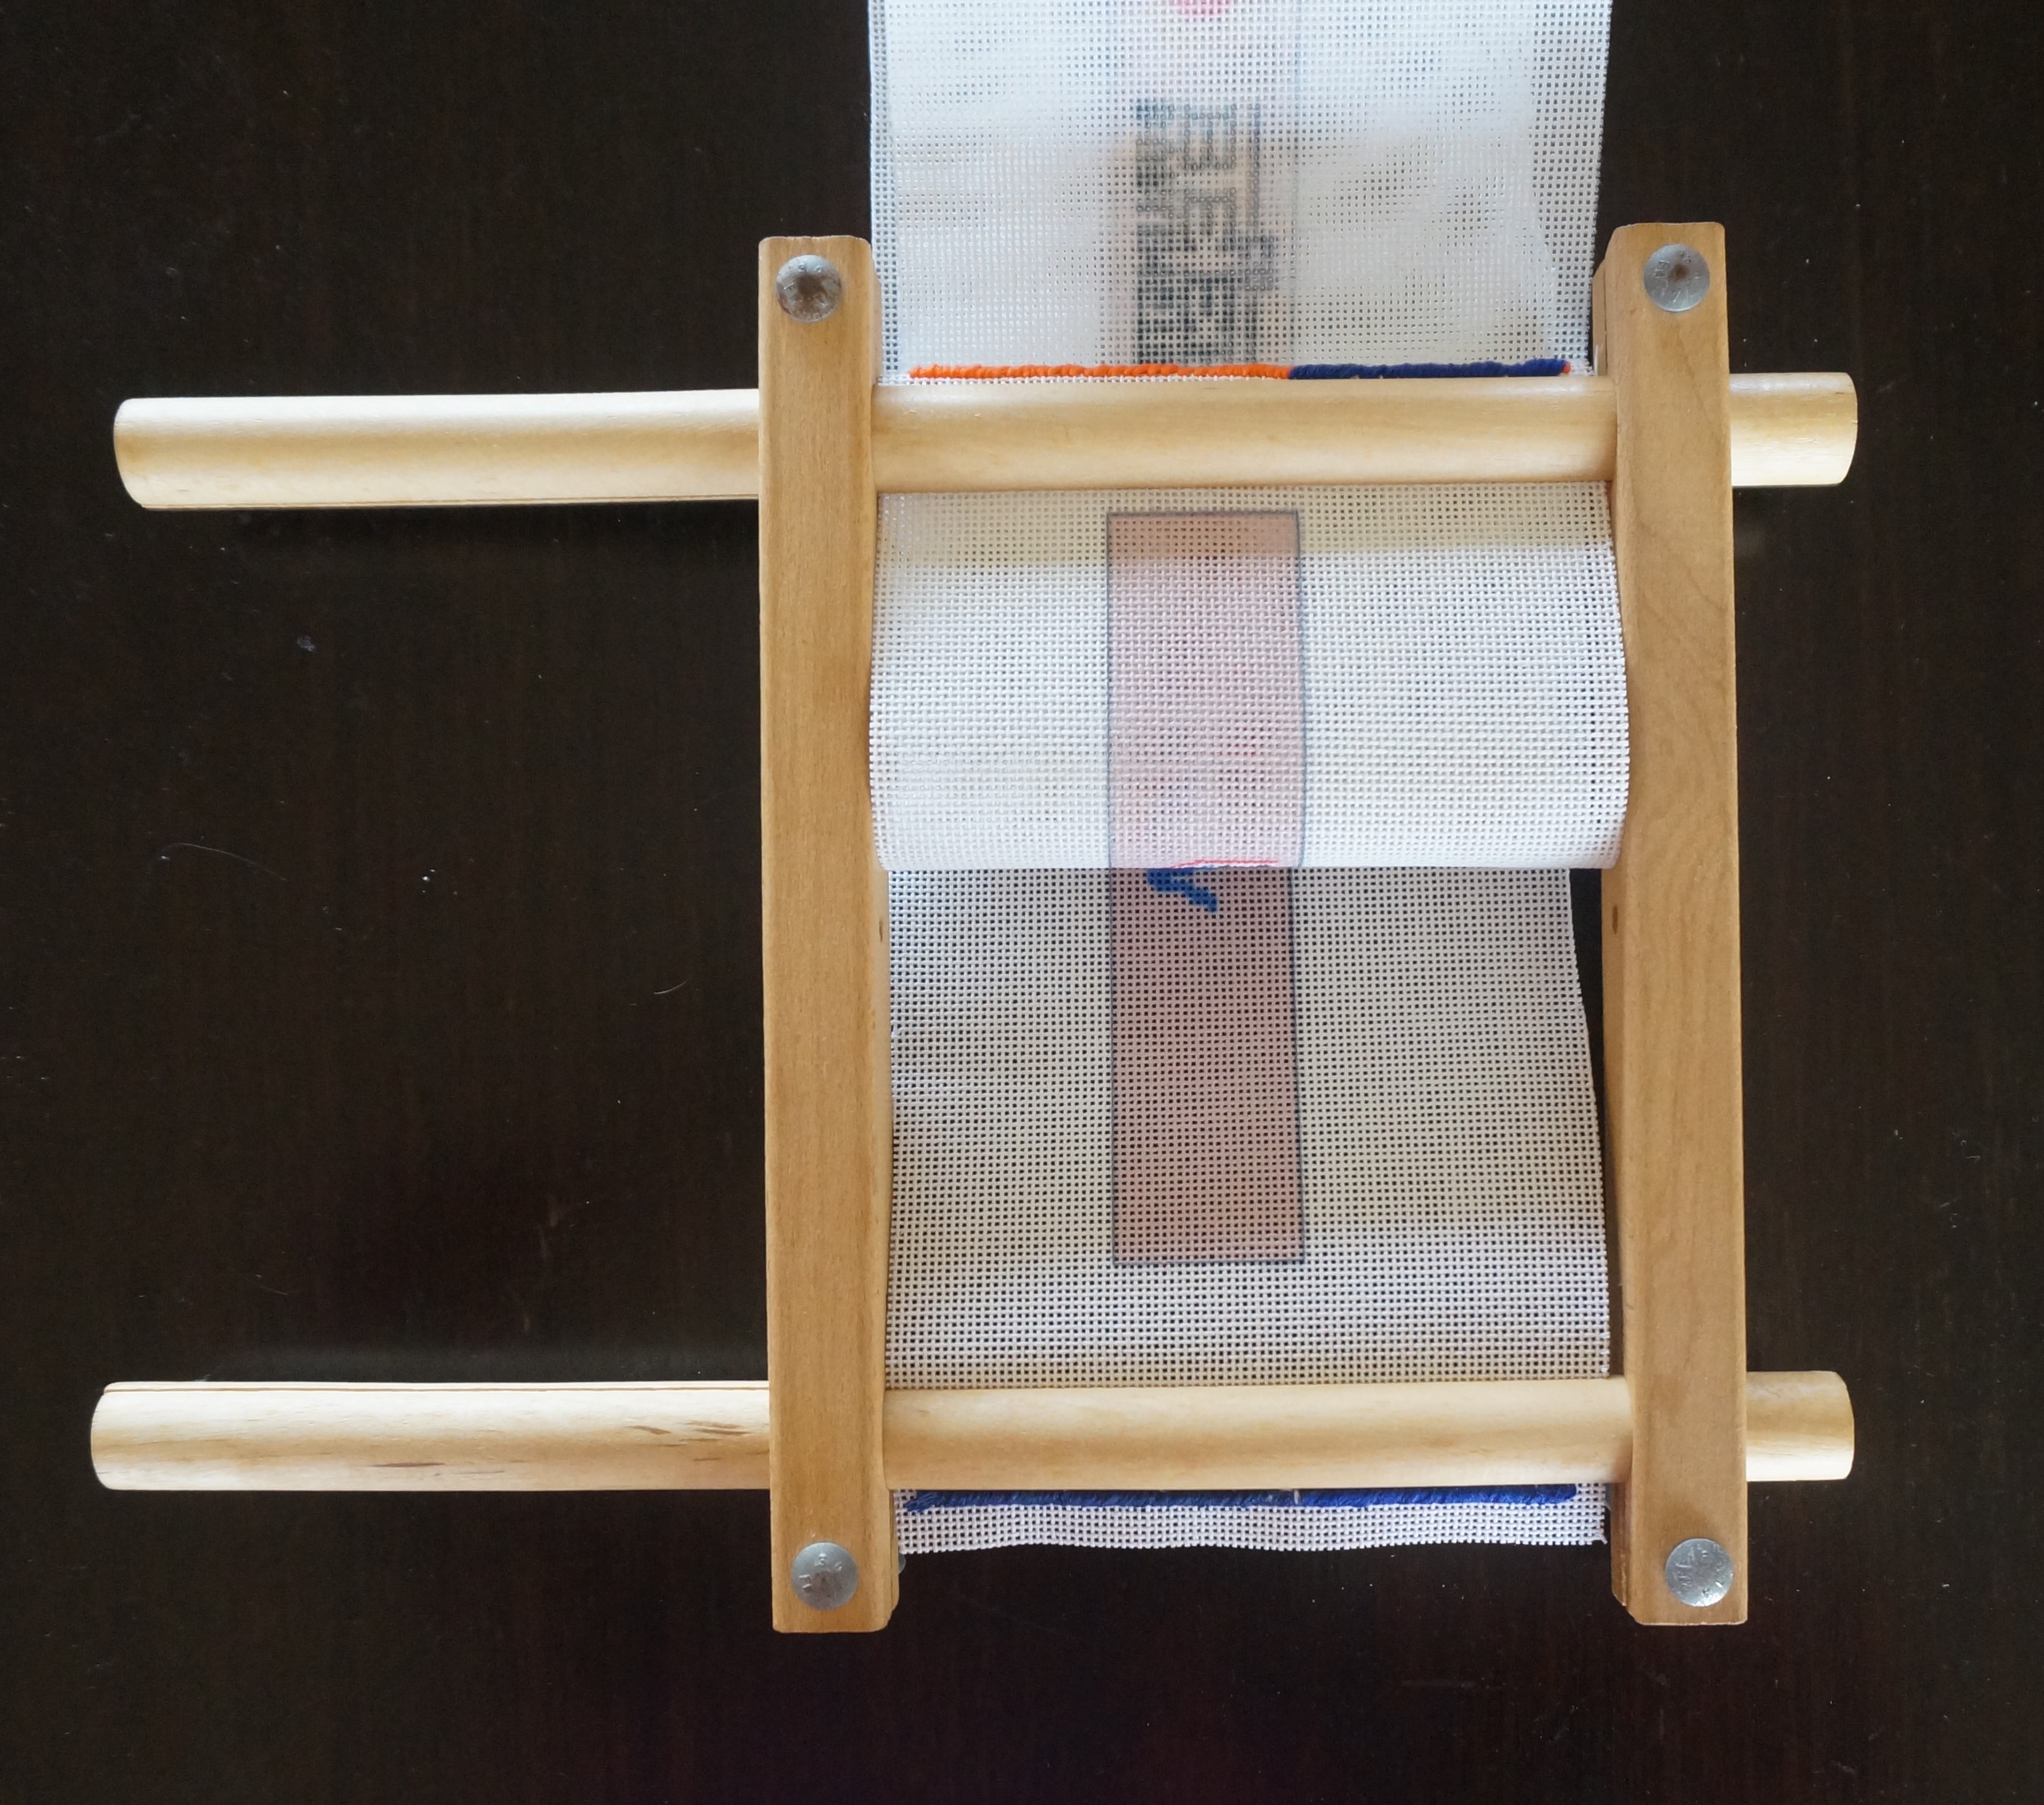
New felt has arrived. Time to block and finish the latest creations.

Happy Holiday Stitching!

NeedlePaint’s New Christmas Stocking Cuffs!

Written by: Peggy Bond

Running late to get a Christmas stocking needlepointed? NeedlePaint suggests a Winter Wonderland Stocking Cuff. Needlepointing the cuff will take less than half the time of a full stocking. The bear and moose are perfect for my nephews who live in Maine,
and the chickadee will be prefect for Amos’ little sister who will be born in October.
It shouldn’t be difficult to get it finished in time for Christmas. 

Burly Black Bear Stocking Cuff Needlepoint Canvas

Woodland Moose Stocking Cuff Needlepoint Canvas

Joyful Chickadee Stocking Cuff Needlepoint Canvas

The bear and moose are finished and awaiting their big day. For texture and variety,
I used several different stitches on the large animals, sky, and snowy ground. 

The sky of the bear cuff is done with the vertical brick stitch done over 2 mesh.

The snowy ground is finished with the horizontal double brick stitch also done over 2 mesh.

For the bear, I wanted some color variation and texture.
His back is done using alternating continental with black and dark brown thread
while his under body and legs are all black and stitched with the continental. 

Alternating Continental Stitch

It’s winter and there must be snow falling sometimes, so the moose got the falling snow which was
created by using 3 strands of sky blue and 3 strands of light blue in the vertical brick stitch.
This created a random design that gives the sense of falling snow. 

The double twill stitch for the snow gives perception to the canvas,
accenting the varying size of the trees.

Diagonal chop sticks stitch: Mr. Moose took some searching for me to find the right stitch – one that I had never seen or used before. I found it in Susan Sturgeon Roberts’s book Needlepoint Dictionary of Stitches. It is called diagonal chop sticks. It is done in two shades of brown. 

I will post a the completed chickadee when I know the name of my niece.

We would love to help you with all of your needlepoint holiday decorations.
Please feel free to contact us with any questions you may have at: info@needlepaint.com

Happy Stitching!

How To Stitch A Needlepoint Belt Canvas

By Peggy Bond

So you have a 5-inch wide by yard long printed needlepoint canvas for a belt. Where do we go now? To a split rail scroll frame which will keep your canvas relatively square while allowing you to access sections of the canvas without having to remove and reposition it.

The F.A. Edmunds 6” x 12” scroll frame is a great option. 

Before putting the canvas in the scroll frame, create “end stops” along the short sides of the canvas. The end stop is made with a doubled length of thread (i.e., 12 strands of floss or 2 strands of wool). First, do running stitches along one row as shown below. Then stitch over that row with a 2 x 2 Continental stitch. The end stops will prevent the canvas from slipping through the slotted dowel rod of the frame.

End Stop

End Stop Diagram

The narrow ends of the canvas are slid into the slotted dowel rods and should go all the way against the end of the slot. Insert the dowel rods into the frame’s spreader rails as shown below. The spreader rails should be flush with the edges of the belt canvas to reduce warping the canvas while stitching. 

In the Frame

Even when the rails’ wing nuts are not tight, the end stops should not be able to be pulled through the dowels and the frame should be a rectangle. The dowels can be turned to roll the canvas as it is worked. After positioning the canvas to a section for stitching, tighten the wing nuts on the rails.

Read to stitch

Where to start the stitching and in what order to do it is a personal choice. Personally, I prefer to stitch all of the images before attacking the background. There is no reason why images and elements can’t be done together as the canvas is wound on the dowels. The only thing to remember is not to stop the background stitches at the same vertical spot on each row.

Belts are most frequently stitched with the Tent stitches. For the belt shown below, the Continental and Half Cross Tent stitches were used for the images and lettering, and for filling in where the background stitch couldn’t fill. The background stitch is the Upright Cross. 

CTF Belt Section

Look for our future post on background stitches.

Here at NeedlePaint, we have a large assortment of needlepoint belt canvases we know you will love stitching!

The Tent Stitch: When, Where, and Why

Written by: Peggy Bond

The Tent Stitch, is the basic diagonal stitch which is the most recognized of needlepoint stitches, and can be stitched in three variations: The Basketweave, the Continental and the Half-Cross. There are pros and cons and a time and place for each of these stitches.

Tent Stitch 

The Basketweave Stitch is stitched on the diagonal as diagramed (see Figure 2) and creates a solid pattern on the back of the canvas (see Figure 1). This is the stitch of choice for chair seats, upholstery items or any piece that will receive wear and tear. It is durable and flexible and the finished piece does not warp as much as those done in the Half-Cross or Continental Stitches. It is truly a background stitch to be done around designs. I didn’t use it anywhere on the yarmulkes I made, but I did use it for the purple border of my Pansy Quilt Rug.

Basketweave diagram

View of the Basketweave Stitch back side (Figure 1) and Basketweave Stitch diagram (Figure 2)


The Continental Stitch is also a good backing stitch. It lacks the durability of the Basketweave Stitch but can be worked in small areas, while providing a solid backing (as shown in Figure 3). My hat bands are usually done entirely in Continental Stitches. The No Tears Pillow was also done entirely in Continental Stitch. This is a good example of when you would not want to use the Basketweave Stitch for the background as it would have made the canvas much heavier than the fabric.

Continental Diagram

View of the Continental Stitch back side (Figure 3) and stitching diagram 


The Half-Cross Stitch provides no backing and is not recommended for backgrounds. It does not cover the canvas well and should only be used on printed canvases where the thread color matches the color of the print. It does, however, use less thread than the Basketweave and Continental stitches. I have used it as the final row around a headband which is going to be turned under when I sew on the backing fabric.

Half-cross Diagram

View of the Half-Cross stitch back side and stitching diagram


One thing to bear in mind with the Tent Stitch, and indeed all stitching, is that thread and canvas need to match. Too fine a thread will not cover adequately, and too heavy a thread will be difficult with which to work and will usually create uneven stitches. Below is a chart matching the threads
(6-strand DMC Cotton Floss and 3-strand Waverly Wool) and the canvases that NeedlePaint offers.

Canvas Mesh DMC Cotton Floss Wavely Wool  Notes
10 Not Recommended 3 Strands
12 Not Recommended 3 Strands For rugs and heavy use items
2 Strands For lighter-weight projects: soft pillows, purses
14 6 Strands 2 Strands
1 Strand Use only on printed canvas where thread matches color
18 6 Strands 1 Strand  Great to use for belts, wallets, flasks


Now having explained the how, when, where, and why of the Tent Stitch, I have to admit that I use it sparingly.

Coming soon My Favorite Background Stitches!

Needlepoint Pillow Finishing Stockings and Key Fobs

If you’ve purchased needlepoint kits from NeedlePaint in the past, you may know that we offer many types of finishing services.  We have some very talented employees here, and I’d love to take a minute to show you what we can do!

Needlepoint Pillow Finishing – offering finishing on all sizes  (Prices Ranges from $100 – $150)

Once you are done with your needlepoint, we’d love to help.  We offer a solid back with a hidden zipper (or no zipper on 8 inches or smaller), and can do piping or no piping.  We include a removable pillow form on pillows that have a zipper.  For the backing and piping, we have 20 colors of velvet to choose from.

Needlepoint Pillow Finishing

Needlepoint Pillow Finishing

Needlepoint Stocking Finishing – (Ranges from $125 to $155)

We finish stockings with a velvet back, piping, and hanging loop.  Inside we put a white liner or coordination cotton liner.

Needlepoint Stocking Blocking and Finishing

Needlepoint Stocking Blocking and Finishing

Needlepoint Tallis Bag Finishing (Ranges from $100 to $150)

We will include a hidden zipper on the back, piping is optional on the front, and the inside is lined with a white liner to protect the tallis.

Key Fob Finishing$23.00

Leather backed “loop” with leather tabs at the end, and circular key ring included.

Needlepoint Key Fob Finishing

Needlepoint Key Fob Finishing

Flask Finishing$60

We offer a 5 oz stainless steel flask, with leather wrap on top and bottom, and 1 side (outside edges of needlepoint)  Dimensions: 4.5″h x 4″w x 1.25″deep

Needlepoint Flask Finishing

Needlepoint Flask Finishing

Card Wallet Finishing – $60

Card wallets made with full grain leather, and include three card slots, and an opening in the top to fold and store money and/or more cards.

Needlepoint Card Wallet Finishing

Needlepoint Card Wallet Finishing

Needlepoint Slippers and Loafers in Style

People love to wear their needlepoint!  It is the biggest trend I’ve seen over the last 7 years, more and more needlepoint is being turned into products that can be used, especially amongst the younger generations.

Custom Needlepoint Slippers and Loafers

The most eye popping project we’ve worked on recently are needlepoint slippers and needlepoint loafers.  Check these out!

Needlepoint Slippers

Needlepoint Slippers and Needlepoint Loafers

This project came to us from a customer in New Orleans.  We designed two new custom needlepoint slipper canvases for him.  (The link actually shows another project we did for a pair of womens needlepoint slippers, but pricing and template are the same)

As far as needlepointing a project like this goes, it is pretty simple.  There are two needlepoint kits that come with thread, which you needlepoint the design area like most projects (in a tent stitch).  Once you are done with the needlepoint, you send them off to be turned into slippers or loafers.  Our customer recommended using: George Cleverly in London. Another finisher in the UK is Bowhill and Elliot. Our customer who stitched the first pair of slippers recommended using: Ryan@stubbsandwootton.com company website is: https://stubbsandwootton.com/ )

Below you can see a needlepointed canvas before and fully finished needlepoint loafers after, enjoy!

Needlepoint Slippers Template Stitched

Needlepoint Slippers Template Stitched

Seven Swans Swimming and Eight Maids Milking Christmas Needlepoint

By: Peggy Bond

We’re continuing our 12 days of Christmas Needlepoint Projects!  (See other posts for all 12 projects!)

Day 7, Seven Swans a-Swimming

The swan is the last of the birds. The only fancy feathering here is on the wings.

Seven Swans o-Laying Christmas Needlepoint Kit

Seven Swans a-Laying Christmas Needlepoint Kit

Seven Swans Swimming Stitch Chart

L Wing Stitch Detail

The pink “L”s in the wing are done with two Cashmere 2×4 stitches – one worked horizontally and the other vertically. The “L”s are surrounded by brown “L”s where space permits and then the remainder of the wing is done in Continental as shown below.


Wave Stitch DetailThe main portion of the wave is the Double Parisian with the peaks done with left and right slanting Continental.

Slanted Straight Stitch NeedlepointAnd, the background Slanted Straight stitch is done over three canvas threads working right to left. It is quick and easy.

Day 8, Eight Maids a-Milking

Our Maid is done with her work and is carrying her milk home from a job well done.

Eight Maids a-Milking Christmas Needlepoint

Eight Maids a-Milking Christmas Needlepoint

Eight Maids Christmas Stitch Chart

Eight Maids Christmas Stitch Chart

Needlepoint Vest DetailHer vest and pocket of flowers require some explanation.

The center of the vest of worked in Slanted Gobelin 3×3 working left to right and right to left to form the lower points of the vest. The edges are Continental and button French knots.


Pocket Stitch DetailThe pocket is done in a manner similar to the heart of the Day 2 and the flowers are a satin stitch.

The Milanese stitch, like the Medieval Mosaic stitch, is quick and easy to do after getting it established.

Now on to Dancing Ladies and Leaping Lads…

12 Days of Christmas Days 5 and 6 Needlepoint Kits

We’re back!  I’ve been short on time because our lead designer is away on Maternity Leave.  Also note, our other designer is going away for 3 weeks in August to help her mom move, so we’re taking a break on custom work from Aug.1 – 22.  We can still do simple custom projects and Karen is here to do production on photo designs and stock designs, so feel free to email and check if you are in a rush.

And onto Peggy’s next two stitch guides!!!

DAY 5, Five Golden Rings

Five Golden Rings Needlepoint

Five Golden Rings Needlepoint

The Five Golden Rings needlepoint kit is a diversion from all the feathers, and also a challenge to get the correct placement of stitches for the interlocking of the rings. The center of each ring is done in Continental and each ring is done in a different stitch as noted on the diagram.

Five Golden Rings Needlepoint Stitches

The interlockings of the rings are number and a detail below shows how the stitches overlap. I am not a fan of metallic threads, but if I were, this block would be an ideal one for them. (Using different stiches for each ring does complicate the block but it gives the finished block more depth. Some depth can be achieved by using the Mosaic or Brick stitch for all the rings.)

5 Golden Rings Stitch Details

Medieval Mosaic Needlepoint Stitch

The Medieval Mosaic background stitch is a pattern found in mosaic ancient floors. Once the first rows are done, working top to bottom, and the patterns established, the stitch is easy and it covers canvas quickly.


Day 6, Six Geese A-Laying

Six Geese A Laying Needlepoint

Six Geese A-Laying Needlepoint

It’s back to the birds with one of the Laying Geese. I doubt that the geese of the original song were Canadian geese, but I couldn’t resist making make one for Day 6.  The Six laying geese needlepoint kit is on our website here.Six Geese a laying needlepoint guide

Nor could I resist giving my goose colored eggs. The blue and pink eggs are done in standard stitches as shown above, but the lavender egg has horizontally symmetric stitching as shown in the detail below.Lavender Egg Slanted Needlepoint Stitch Detail

The center is a vertical straight stitch over 3 canvas threads and the top and bottom are Continental and Slanted Gobelin 2×2, done left to right for the top and right to left for the bottom.

The Shingle stitch for the background is my favorite of the background stitches used in this project and is the only one that I repeated. It will be seen again on Day 11.

This is the half way mark… only one more feathered friend to go!

Four Calling Birds and Three French Hens Needlepoint Guides

Stitched and written By:  Peggy Bond

Day 3, Three French Hens Needlepoint Kit

French Hen Needlepoint Kit with Stitch Chart

The French hens were just too plump to put all three on the block so we only have one, sitting fat and happy on her flowering nest. No eggs in view!

All but one of the stitches for this and the next block can be found in The Needlepoint Book by Jo Ippolito Christensen. However, some are worked in different directions than shown in the book.

The head of our lonesome hen is stitched in Continental as are her comb and beak. Her eye is a French Knot. Her breast and tail are Kennan and the wing tips are alternation rows of Slanted Gobelin 2 x 2 and Continetal worked slanted from top left to right.

Flowers are Continental with their centers done is varying numbers of French Knots to fill the canvas. The branches are Continental as well, and the leaves are done in variations of the leaf stitch.

French Hen Needlepoint Stitch Guide

French Hen Needlepoint Stitch Guide

Victoria and Albert Herringbone

V and A Herringbone

The hen’s wing is done in Victoria and Albert Herringbone, show below. It is a variation of the standard Herringbone was adapted from a Victory and Albert Museum Handbook of embroidery stitches by Sherlee Lanz.

Background is Woven Plait which is similar to and simpler than the Victoria Albert Herringbone. The Woven Plait is a quick background stitch that has texture.


Day 4, Four Calling Birds Needlepoint

Four Calling Birds Needlepoint Canvas fully Stitched

Four Calling Birds Needlepoint Kit

The Four Calling Birds block is the other symmetrically designed block.

The yellow of the birds is done in Lazy Knitting, worked left to right on the left half and right to left on the right. The same is true for the Slanted Gobelin 2×2 of the tails and the green Slanted Gobelin 2×2 of the wing. Lazy Knitting is one of the more tedious stitches, but contrasting texture to the Slanted Gobelin makes it worth the effort.

Four Calling Birds Needlepoint Guide

Four Calling Birds Needlepoint Guide

The flower is done with 4 Scotch squares on each petal. It is edged in Satin to round out each petal. The flower center can be stitched in white Continental, or yellow French Knots or maybe some beads? There are possibilities on all or the blocks to add some flare with beads and/or sequins. Flower centers and eyes are obvious choices for these types of embellishments.

The leaves are variations of the Leaf stitch and branches are vertical or horizontal Gobelin. (The traditional Gobelin is a straight stitch over 2 threads of the canvas. It can be stitched horizontally or vertically. And, as used for the birds, it can be stitch on diagonally, i.e. over 2 strands horizontally and vertically making it twice the size one of the Tent stitches – Continental, Half Cross, or Basketweave.)

The background is the Diagonal Mosaic, not to be confused with the Mosaic stitched diagonally. Unlike the background of the Two Turtle symmetrical block, this background is worked continuously across the entire block. That is not stitched in opposite directions on each half.

Coming up a break from birds…. Five Golden Rings, the most complex of the 12 blocks!

Celebrating the 12 Days of Christmas in Needlepoint

Needlepaint’s 12 Days of Christmas needlepoint canvases were inspired a quilt my mother made 25 years ago. Use the 3-inch circular, 18-point ornaments to decorate a tree or the 6 x 6-inch 18-point blocks to hang as a bunting (8 x 8 inch on 14 mesh). They are an ideal size to be  done while traveling, waiting in a doctor’s office, or babysitting a sleeping grandchild.  Or, in the tradition of a quilting bee, canvases can be done by several different needle-pointers.

I stitched and finished the bunting…….

12 Days of Christmas Needlepoint Kits

12 Days of Christmas Needlepoint Kits

The blocks can be stitched with the continental stitch However, I used a variety of stitches using DMC 6-strand floss.Quick-cover stitches for the backgrounds sped up completion and others I chose to provide texture. (Stitches will be described in subsequent blogs.) Beads, sequins, and/or ribbons could also be added for textures and highlights.

Finishing and display options are numerous…  If one has a large wall space or fireplace, a 12-block bunting would be cool, but it is easier to find a place for a shorter 4-block 3 string display. Also, consider a 2-block 6-string or 3 strings of 3 blocks, 4 blocks, and 5 blocks.

In the photo above, the blocks are framed and backed with red felt, hand-stitched together with 3 strands of red DMC floss to match, and strung on a ¾-inch strip of felt. If you are not into buntings, the blocks could be used to decorate a table or sewn together for wall hanging or table runner. Each could be framed in the Mill Hill Wooden 6 x 6-inch frames which are designed for needlework and available online from several vendors, including  JoAnn or Amazon.

Detailed directions and alternatives for finishing will be addressed in a later blog.